Welcome to my new blog! And my new shop! And my new cool statement tee…
Most is still not quite in place (much like when you move house and only set up the kitchen, while some boxes still are left un-unpacked after a-hem 6 years) and there might be some broken links, but it’ll do for now, and I’ll just take the rest step by step…
So on with the show!
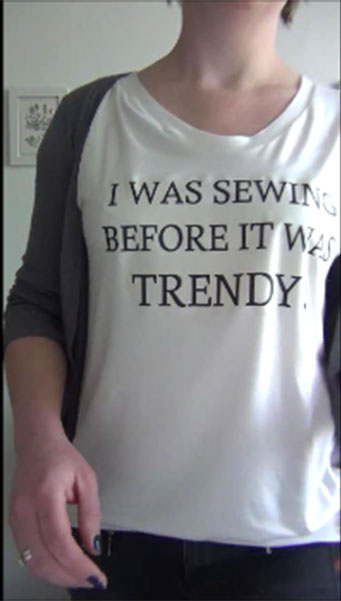
There I am – wearing the tee (shot from a video)
I’ve been talking a lot about printing on t-shirts lately (like [here] and [here]). This will be my last installment on the subject for the moment.
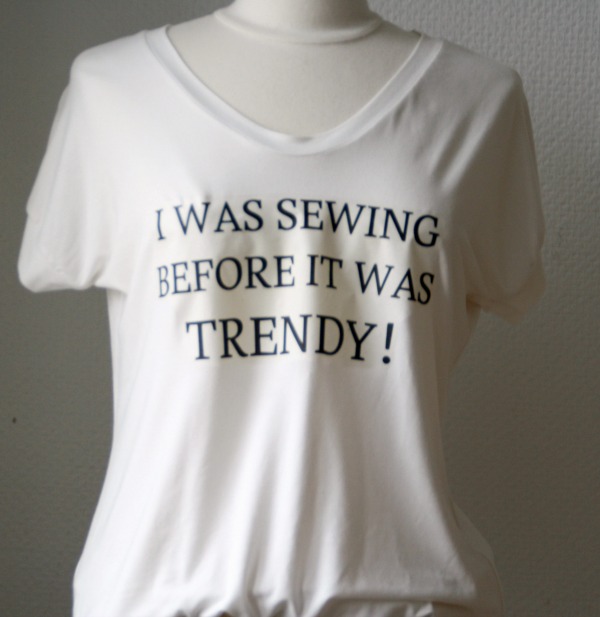
It’s all about a very easy DIY statement tee.
Statement tees are still super trendy this spring and summer! Especially if they are slightly oversized and worn with skinny jeans or shorts.
(I’ve collected some examples on this Pinterest board)
I love how easy it was to make this statement tee! It literally took me less than 10 minutes to make this print and press it on the tee.
(Okay. So maybe I was planning to do this blog post but had to take pictures while there was still enough daylight. So I had to make the print on the tee before I sewed it up. But you could totally add the print on any tee – you don’t even have to sew it)
So. Anyway. I started out by trying to decide what text I wanted on my tee. Then I wrote it in my drawing program, saved and then mirrored the image. (This is a very very important step, that you don’t want to forget. Ask me how I know)
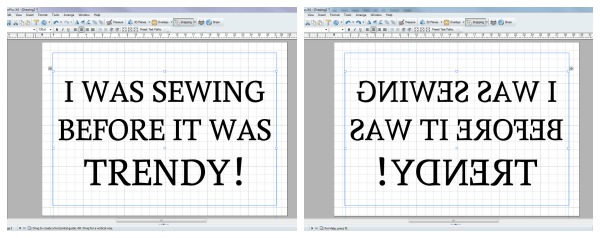
I printed my design on transfer paper for inkjet printers (There are many different brands and some are definitely better than others. Mine wasn’t the best quality, and also it was old (they apparently go bad after about a year, I’m told), but it was what I had on hand). For my cream-coloured Olivia Oversize Tee, I used a transfer paper designed for light fabrics.
I roughly cut out the motive then placed it on my front piece and pressed it on, following the instructions on the package (press 20 seconds, then move until you’ve covered the entire motive). I then let it cool, before I peeled off the backing.
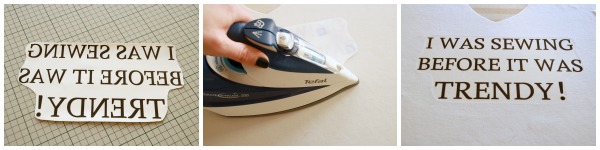
Print, Press, Admire!
And that’s it. That’s how easy it was to make a statement tee!
Now the world can see that I was sewing before it was trendy:-)

Do you want to tell the world, too? I have the mirrored image in a .pdf for you – right [HERE].
Or what do you want to say on your statement tee? Any suggestions?