
Today on HEAT TRANSFER VINYL
Hello hello – I’m still obsessed with t-shirts here. Maybe it has something to do with me teaching so many of my T-shirt fitting workshops at the moment.
It’s funny – I have taught this workshop more than 30 times. And still. I taught one on Saturday, and there was a new kind of alteration. Isn’t it amazing?
Well, I’ll get back to that on a later time (I’m sort of thinking about how I could turn this workshop into a book or an on line course..) for today is about getting my t-shirt to be cool enough, using heat transfer vinyl, that my non-sewing friends would want to steal it from me!
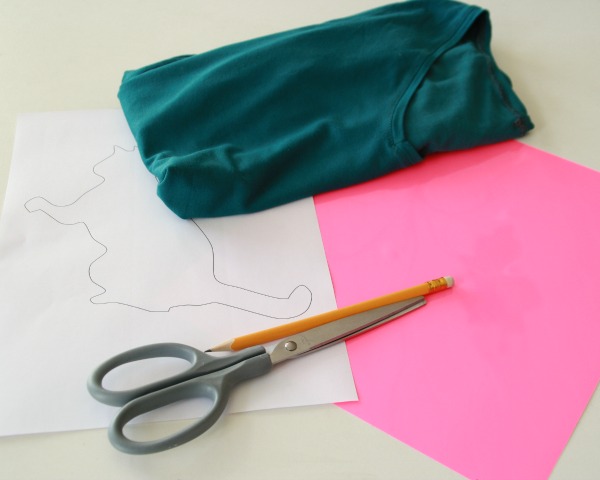
What you need: A t-shirt, a motife, heat transfer, scissors and a pencil
What are heat transfers, you ask?
Well, it’s the kind of vinyl-thing, that t-shirt printers use with a heat press to add designs to t-shirts for the industry and for companies who want prints on t-shirts.
In the last couple of years it’s been a trend among some bloggers to buy this vinyl wholesale and use it and even sometimes resell it for all of our benefit. And recently it’s also hit the fabric stores (here in Denmark, anyway) and you can also get it on Amazon.
Let’s get going:
First: Gather you supplies.
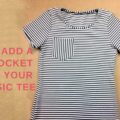
You need the heat transfer vinyl, something to print on (I’m using an old, ragged Birgitte Basic Tee, that could do with a touch-up), a design (I’m using the same cat outline that I used for the stencilling a few posts back), pen and scissors.
Now: Get your heat transfer ready.
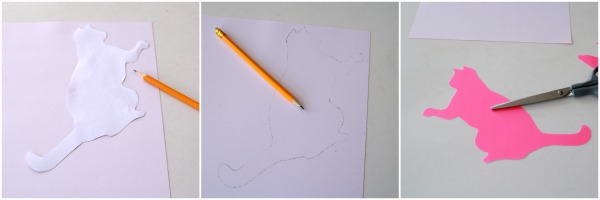
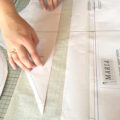
Trace and cut your design from the heat transfer
Cut out the design, trace it onto the wrong side (the glue side) of the heat transfer (remember to mirror the design – especially if you are making letters) – and cut the heat transfer.
Pre-heat your t-shirt by ironing it for about 10 seconds (check the heat settings on your iron!), then place the heat transfer on the t-shirt.
Cover the t-shirt with a pressing cloth (I’m using silk organza, but it could also be thin cotton), and press the heat transfer on by pressing for 30 seconds (check the package, it might vary). If it’s a large design, you might have to move the iron and press each segment for 30 seconds.
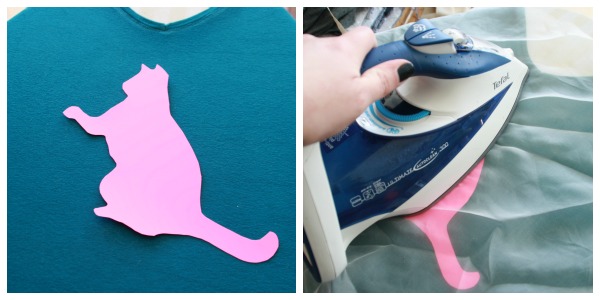
Place the design on the t-shirt and press it on (covering with a pressing cloth)
Carefully turn the t-shirt right side out, and press the heat transfer from the wrong side another 30 seconds.
Leave the t-shirt to cool completely, then carefully peel off the plastic cover.

Carefully peel off the plastic cover!
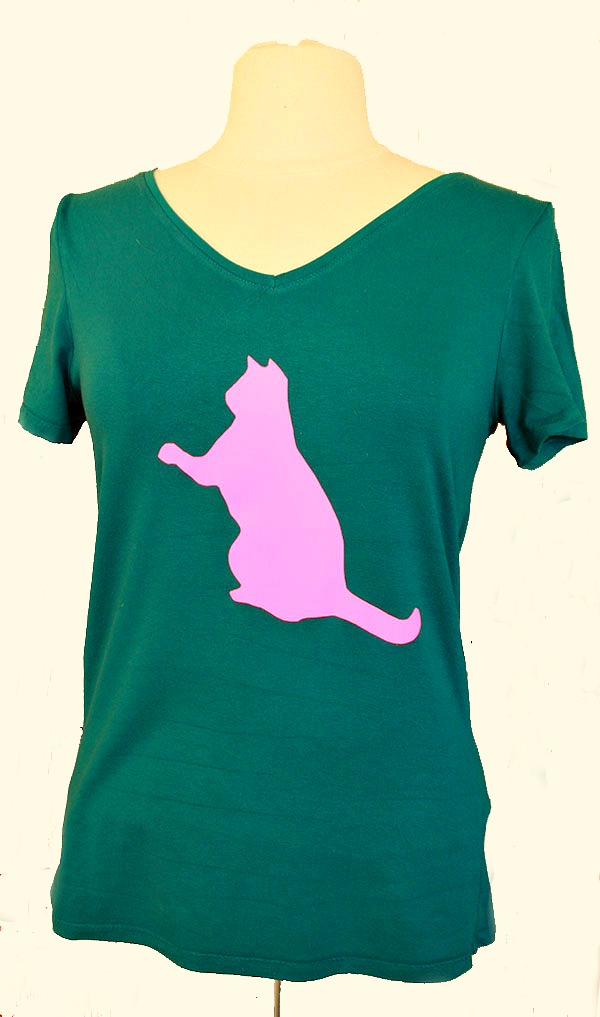
And you are done!

All done! Except I think I want to add some paw prints on the back!
P.S. You could totally create a design in more parts – for instance, if I wanted the cat to be pawing a ball, I could have added that…


This makes me want to start printing on some of my old tees :)
Oh, you should! It’s fun, and it recycles old t-shirts, so it’s good for the environment, too:-)
This is awesome! I would love to do this with my daughter. One question: does it wash well? Or are there special washing directions? Is it safe to put in the dryer?
Thank you!
Jen
Hi Jen!
It washes well. My directions says to wash it at 40 degrees C, which is the ususal lukewarm program I use for clothes. No dryer, though, that would probably ruin it…
Hello admin, i must say you have hi quality articles here.
Your website can go viral. You need initial traffic only. How to get it?
Search for; Mertiso’s tips go viral