
Sometimes you just come across a pattern where a traditional Full Bust Adjustment (an FBA) might be complicated due to cut lines or other things that makes it difficult to do the cutting and spreading of the usual FBA..
Sometimes you just want a really fast full bust adjustment method that’ll work with no-dart fronts and that’s what I’m going to show you today.
The pros for using this method is that it’s incredibly fast, requires no fiddling with the sleeve seam or side seam lengths and that it really works very nicely – especially with t-shirts and other knits.
The cons are that this method doesn’t add length to the centre front as other full bust adjustments does, meaning it’s only suitable for smaller adjustments (or you can add extra length to centre front and curve the hem up to the side seam, but the amount is hard to guess – allow for a toile or two)
What is a Full Bust Adjustment?
I think I’ll start by explaining what a full bust adjustment is and why it’s such a great fitting tool (you can skip this part if you are already a fitting pro, but for any new sewers I think it’s important to refresh:-)).
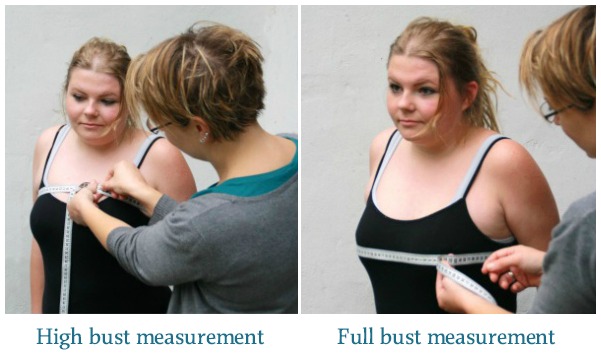
Let me move back to square one for a moment, to explain why anyone might even need a full bust adjustment: Most sewing patterns are drafted for a B-cup bust. This means that at some point people have collected all sorts of measurements, and decided that a person with a shoulder of that length and that back width would have a bust measurement of that if she had an (at that time) average B-cup bust. A B-cup bust in this context is commonly defined as a bust where the difference between the high bust measurement and the full bust measurement is 2 – 4 cm. Which is not very much. And not the average any more.

The problem is, that most patterns are still drafted for B-cups, and this means, that if you have a larger bust than what the pattern is drafted for, you need to choose the size you should have if you did have a B-cup bust, and then make room for the larger bust you have. This will make the top or dress fit better everywhere.
The Easy Turn and Slide Full Bust Adjustment Method
Disclaimers: A) This method works best when the adjustment is less than 10 cm / 4 inches total and is best with a no-dart front pattern.
B ) I’m working in cm. I’m a metric kind of woman. I’ve tried to translate measurements into inches as well, but it might not be accurate – I can’t get my head around the fractions…
Here we go:
Step 1: Figuring out how much to adjust for.
To figure out how much Full Bust Adjustment you need to do to the pattern, you need 3 measurements: Your high bust measurement, your full bust measurement and the full bust measurement from your corresponding size on the pattern size chart.
First your full bust and your high bust measurements. We need those to establish IF you need the FBA and WHAT SIZE you need to use as a starting point.
Example: My high bust is 86 cm (33 3/4 “) and my full bust is 91 cm (36 1/4”). This means I have a difference between my high bust and my full bust of 5 cm. And since 5 cm are more than 4 cm (the amount patterns usually allow for), I’m going to need a Full Bust Adjustment.
Now to figure out what size I need as a starting point: With the need for FBA established, I now need to refer to the pattern size chart to find the best size for me. I’m using The MariaDenmark Birgitte Basic Tee as a reference here, but this goes for all patterns!
The important thing here is to remember to choose the size according to your high bust measurement!
If you fall between sizes, like I do – my high bust is 86 cm, you might recall – it’s my experience from many, many fitting classes, that most people should choose the smaller size!
Which means, I’m going to go with the XS in this example.
The XS is made for a full bust measurement of 84 cm, as you can see. My full bust is 91 cm, so I need to add 7 cm total to the bust on the pattern.
Step 2: Get out your pattern front piece
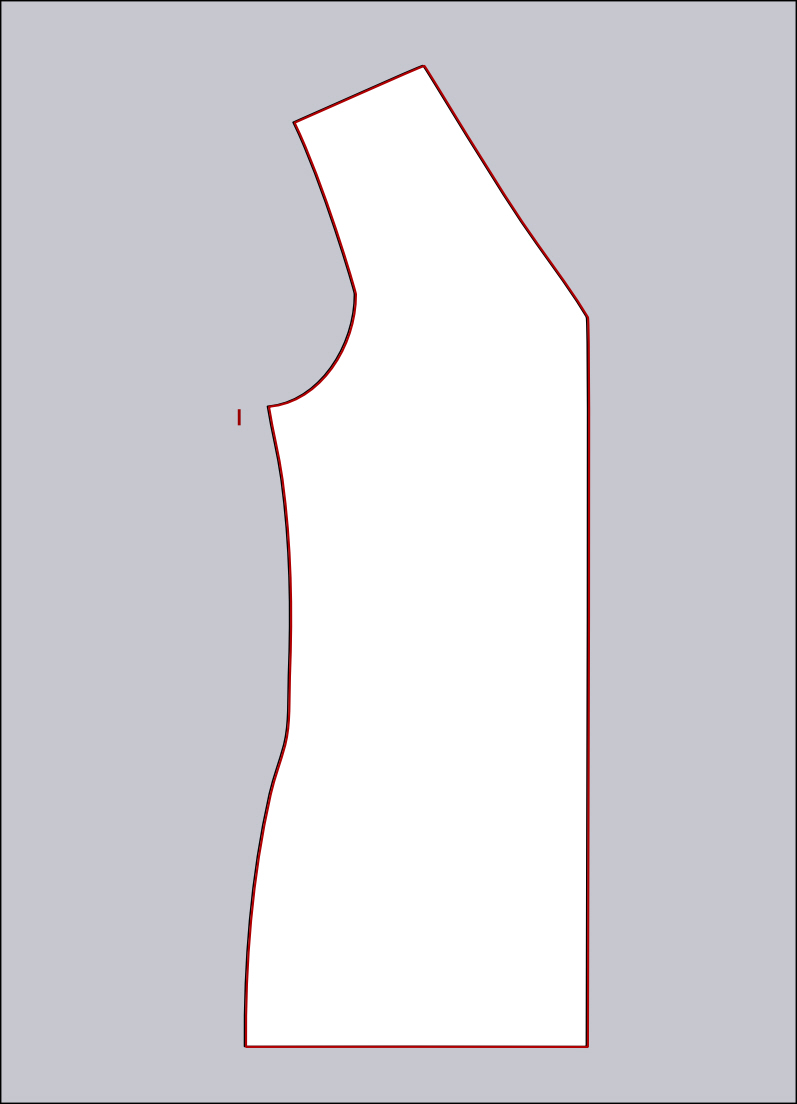
NB: We are only working on the front piece (you can always work on fitting the back piece later, but that’s a different blog post altogether). That’s because the boobs – which are what we are making room for actually, you know, are placed on the front of the body:-)
Get out your front piece (with out seam allowances!) and place it on a new piece of tissue paper. Trace around your pattern piece.
That done, we need to make a marking on the tissue, to get ready for the turn-and-slide. We are working on half a front. Since I was going to add 7 cm total to the bust, I’m going to make a mark 3.5 cm (half of the 7 cm) out from the bust line.
Now we are ready to roll!
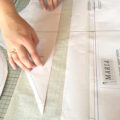
Step 3: Slide… slide away..
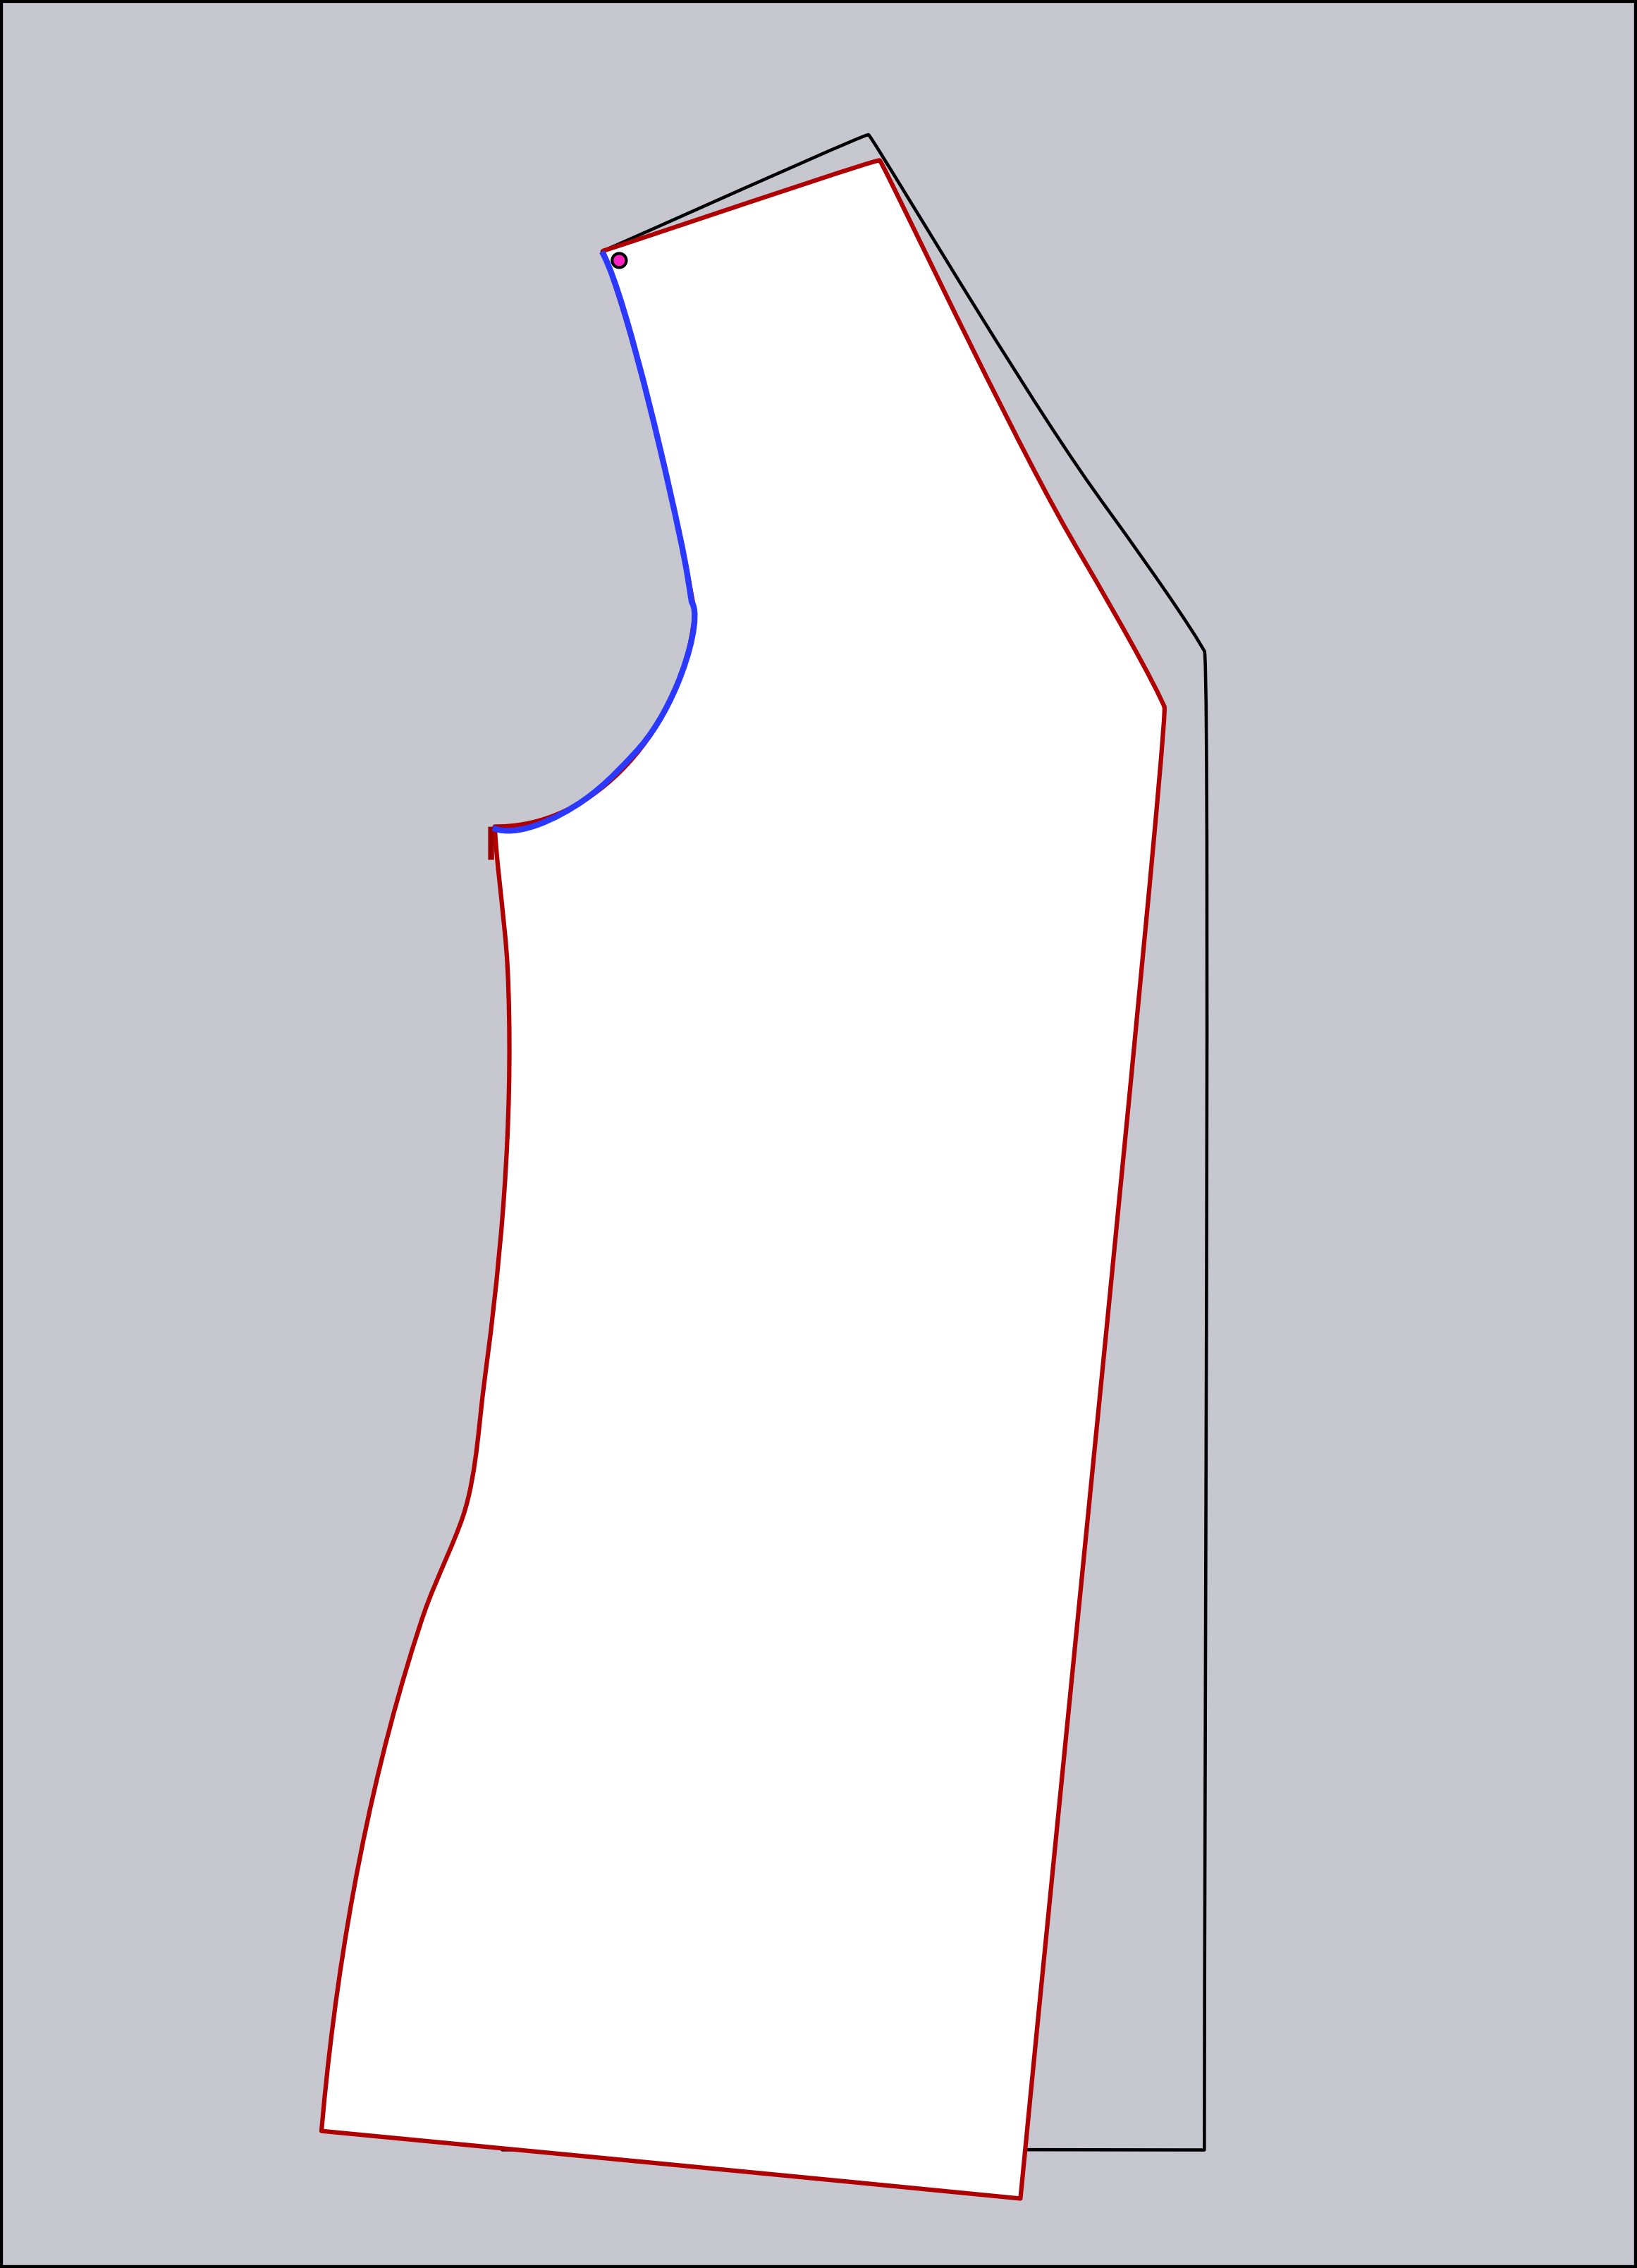
Now place a pin (or your finger. To be honest, I always just place a finger firmly) on the outer corner on the shoulder (I’ve tried illustrating that with a dot on the drawing) and slide the pattern piece until it meets the marking you made.
Put something heavy on top of the pattern piece (like a pattern weight, a can of tomatoes or a candle holder) to keep the piece in place, and then trace the new armhole, using a different colour than you used in the first tracing (here I’m using blue).
Step 4: Turn and slide back..

Without moving the pattern piece (but remove the pattern weights), move your finger to the point where the armhole and the side seam meet.
Press down firmly, and then slide the pattern piece back, so the pattern comes back to the same hip width as before. If you know that you will need more width below the waist or at the hips (you can always measure and compare with the pattern measurements) you can choose to not slide the pattern pieces all the way back.
Trace the new side seam (with blue, here).
Step 5: You are almost done…
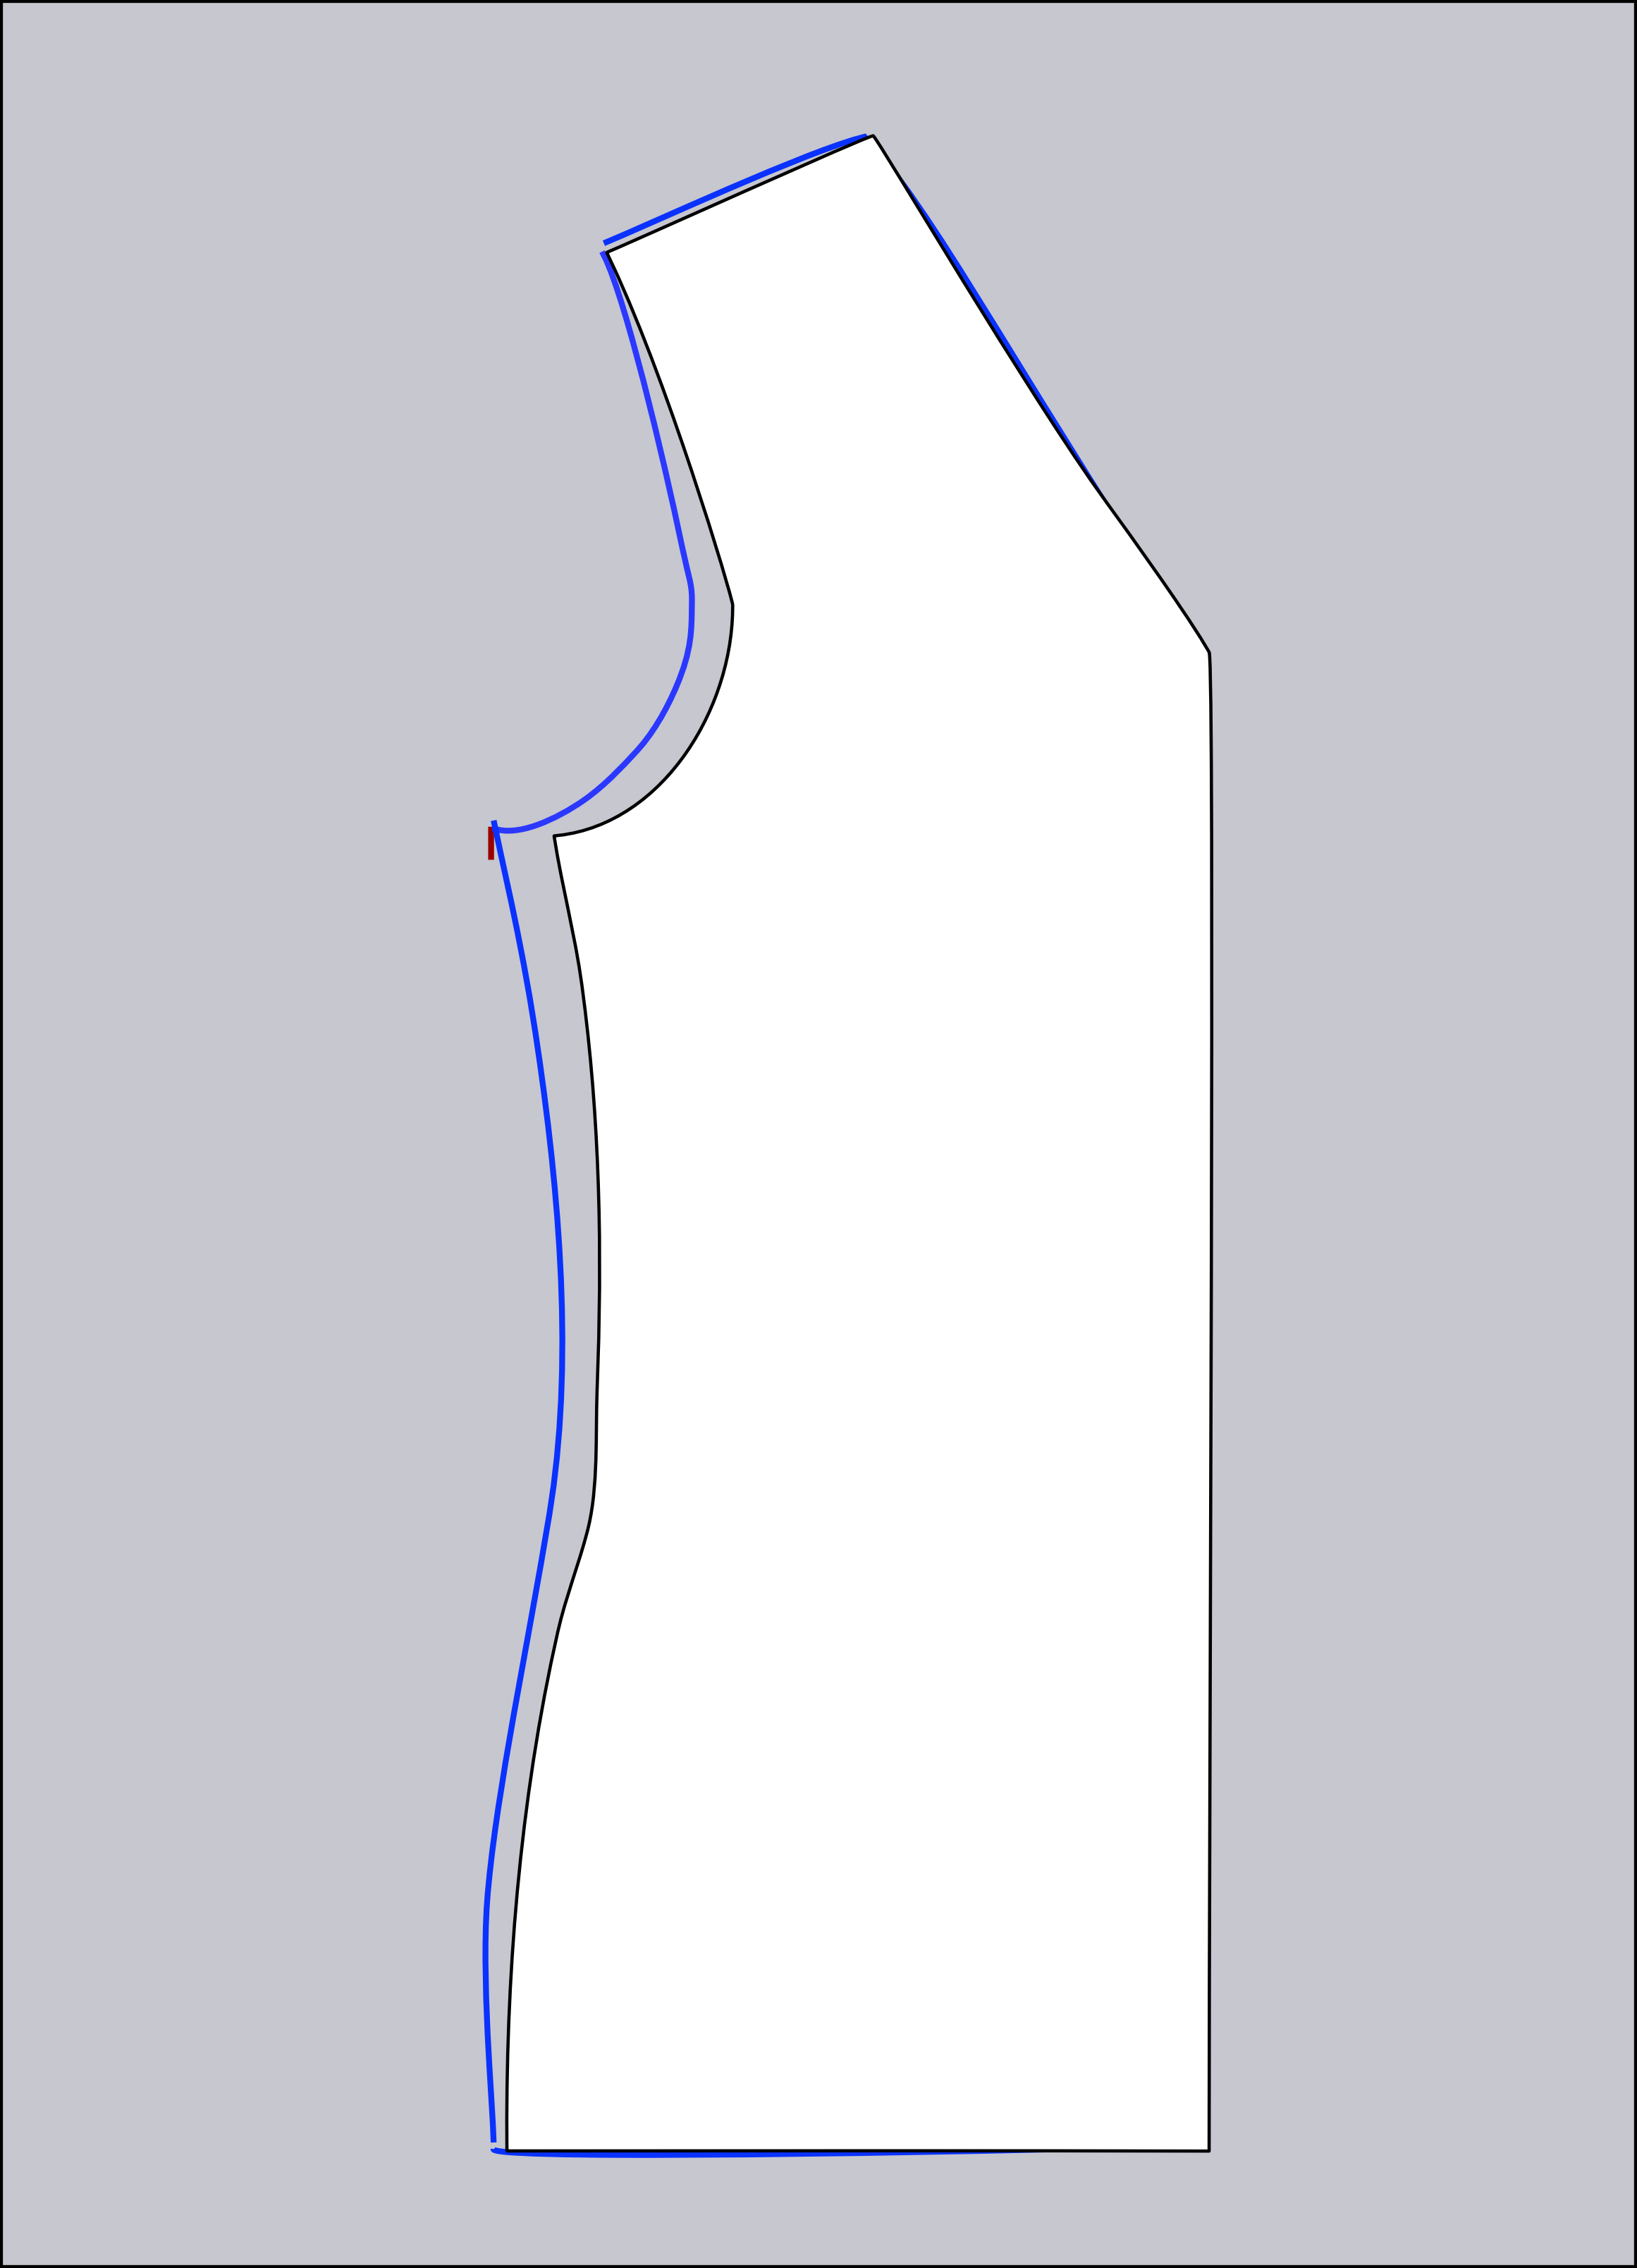
Just trace the original shoulder line and centre front line and the neckline in the blue colour (or whatever colour you are using), and you are ready to add seam allowances to the new blue pattern and cut.
You can see that the original (white traced with black) pattern piece and the new piece only differs in that there is more room at the bust (and a little bit over the waist). The neckline, shoulder and side seams are the same.
I always have to add a bit to to both the front and back side seams.
Fast and easy – but remember, only for the smaller full bust adjustments…


Yikes! I never thought I would be so happy to have non existent body parts! I just pin my darts on the pattern pieces and take them right out. Perfect every time! But I did like your instructions. And have fun with your son!
Great, thank you very much for this instructions. I will try it to get best fitting tees :-)
I’m wondering why this adjustment won’t work if you have to make a 4-5 ” adjustment? Thanks for your help.
Tammy – Like I explained in the article, it’s because this alteration doesn’t add length to the centre front area – which other FBA methods do (and you need the extra length to cover your bigger boobs). You can still use this method – byut add length to centre front and curve the hem up to the side seam. The amount of length to add is difficult to guesstimate (but if you know how much you are adding with a traditional FBA, that would be a great place to start), so allow for a muslin or two
Why can’t you mark the center front at waist while the pattern is tipped out to the larger side seam for the proper length to add to center front waist. When you are done tracing pattern use the mark as a guide to draw a curved waist seam from side seam to CF?
Thanks, Maria. Your directions and illustrations are always clear and easy to follow. I appreciate them so much!
xxoo
Rosalyn
Maria, thank you for sharing.. this is so easy and clear..
This is really handy, thank you! I was wondering how it would work for the Kirsten Kimono tee though? I can’t for the life of me work out how to do a FBA when you don’t have armholes!
Hethi – you simply cut off the arm, do teh alteration, and then tape the arm back on the pattern. I’ll put it on my list for future tutorials!
Is the tutorial for easy FBA for the Kirsten Kimono tee already online? Unfortunately I did not find a tutorial using the search to this day. I just wanted to do easy FBA for the Kimono Tee (before I´ve read your comment here) but it did not work. Now I am going to try to cut the arm off :-)
Thanks for your answer and have a nice Sunday.
Sorry for bothering you again concerning easy FBA for Kirsten Kimono tee. I am not sure where I should cut off the arm exactly: Where to start to cut off on the shoulder seam (how to get the outer corner of the shoulder?) and where to end in the armhole?
Thanks for your answer again :-)
Yes, I am in the same situation now, with the FBA for the nice Kimono Tee!!! ;-D
Thank you, Maria! My difference in bust measurements came exactly at 8cm. So, this should work for me too.
Have lots of quality time in London!
That’s great! And so easy! Thanks for sharing!
Thanks for the clear tutorial! Seconding the vote for a tutorial for the kimono t; I’ll try chopping the sleeves off in the meantime. Tusind tak!
Hi Maria. Great info, especially for my sewing project today.
I’m wondering if pivoting from the shoulder point would add too much material above the bust. Do you think this method would work if you pivoted the pattern from the traditional FBA 1/3 down the armsyce (instead of the shoulder)?
Thanks
Hi Ame
There is a risk for a bit of fabric bunching using this method, all though I have yet to see it as a problem in real life. However your FBA is very big, it would be better to do a traditional FBA.
I haven’t tried pivoting from the armscye…. Why don’t you try and let me know how it works? You can probably tell from the paper pattern if it’ll work or not.. Just bear in mind that you need the armscye length to be the same as before (although it might have a different shape) as well as the shoulder length.
I did the FBA using Maria’s other method (https://www.mariadenmark.com/2019/06/a-better-fba/) and I did find that there is a bit too much fabric above the bust. I’m not sure what to do about that! It fits much better across the bust and back.
Everywhere says measure high bust and deduct from full bust to work out FBA adjustment. But I get a difference of 1 inch and I wear 30gg bra. So is the problem that I have a very narrow back? How can I calculate the FBA?
Hi I totally understand why some tops haven’t been sitting on me correctly however I seem to have the opposite problem. In a bra size I am an A cup so how would I make a small bust adjustment?
Gillian, I believe you would start off by making your very first mark INSIDE the pattern rather than outside. Then swing the pattern in to meet that mark ( just like she showed you to swing it out to make it fuller, you will swing it in to make it narrower), the amount you calculated. Then redraw as she tells you.
Brilliant! Thank you for solving a problem for me.
zBbPRu http://www.LnAJ7K8QSpkiStk3sLL0hQP6MO2wQ8gO.com
Hi admin, i’ve been reading your website for some
time and I really like coming back here. I can see that you probably don’t make money on your site.
I know one awesome method of earning money, I think you will like
it. Search google for: dracko’s tricks
certainly like your web-site but you have to check the spelling on several of
your posts. Many of them are rife with spelling issues and I in finding it
very bothersome to tell the reality however I will certainly come back again.
Finally, the as soon as-chiseled best-vpn Flex hhas begun to show iits age subsequent to its youthful,
extra agile brother, the best-vpn Drive.
I can’t wait to try your method on a dress pattern with no separate bodice (McCall’s 6958). I only need to add an inch, but it makes all the difference :)