
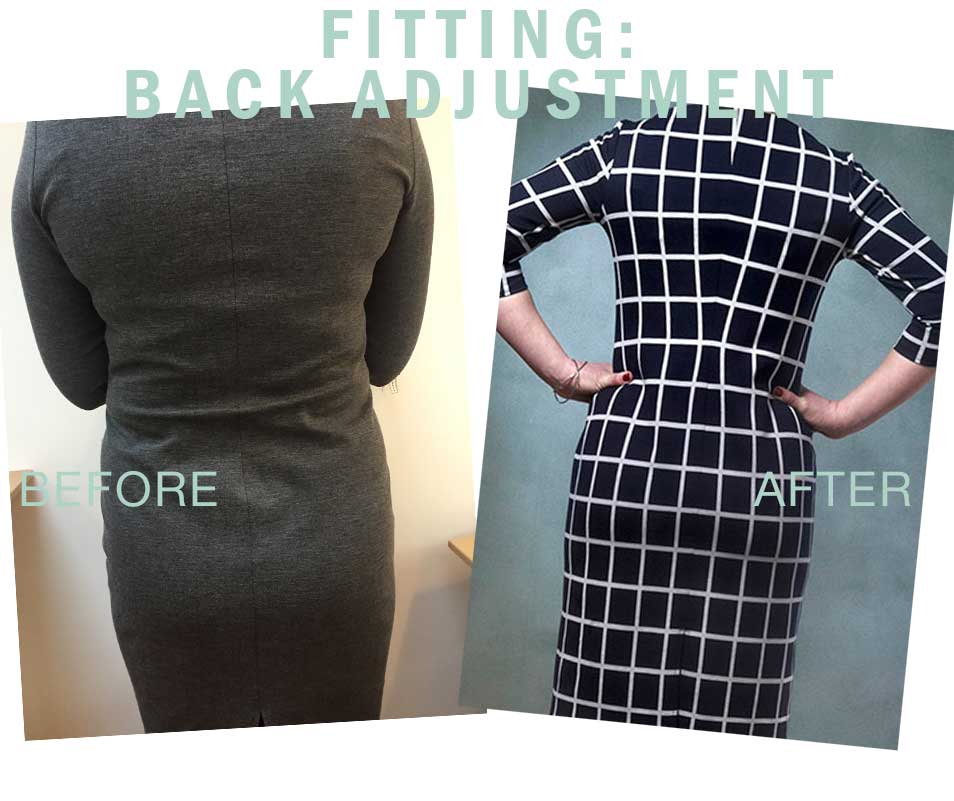
Fitting a swayback: How to get rid of the folds on the back of your dress
Try standing with your side to a mirror. Or have a friend take a picture of you from the side. Is your back straight? Completely straight? Or do you have curves, making you almost the shape of an S?
Most women do. So you might think it’s a bit strange that so many close fitting dresses have a straight centre-back.. .(Exceptions are for instance MariaDenmark 407 Annika Dress and the knit dress in Sysiden #23)
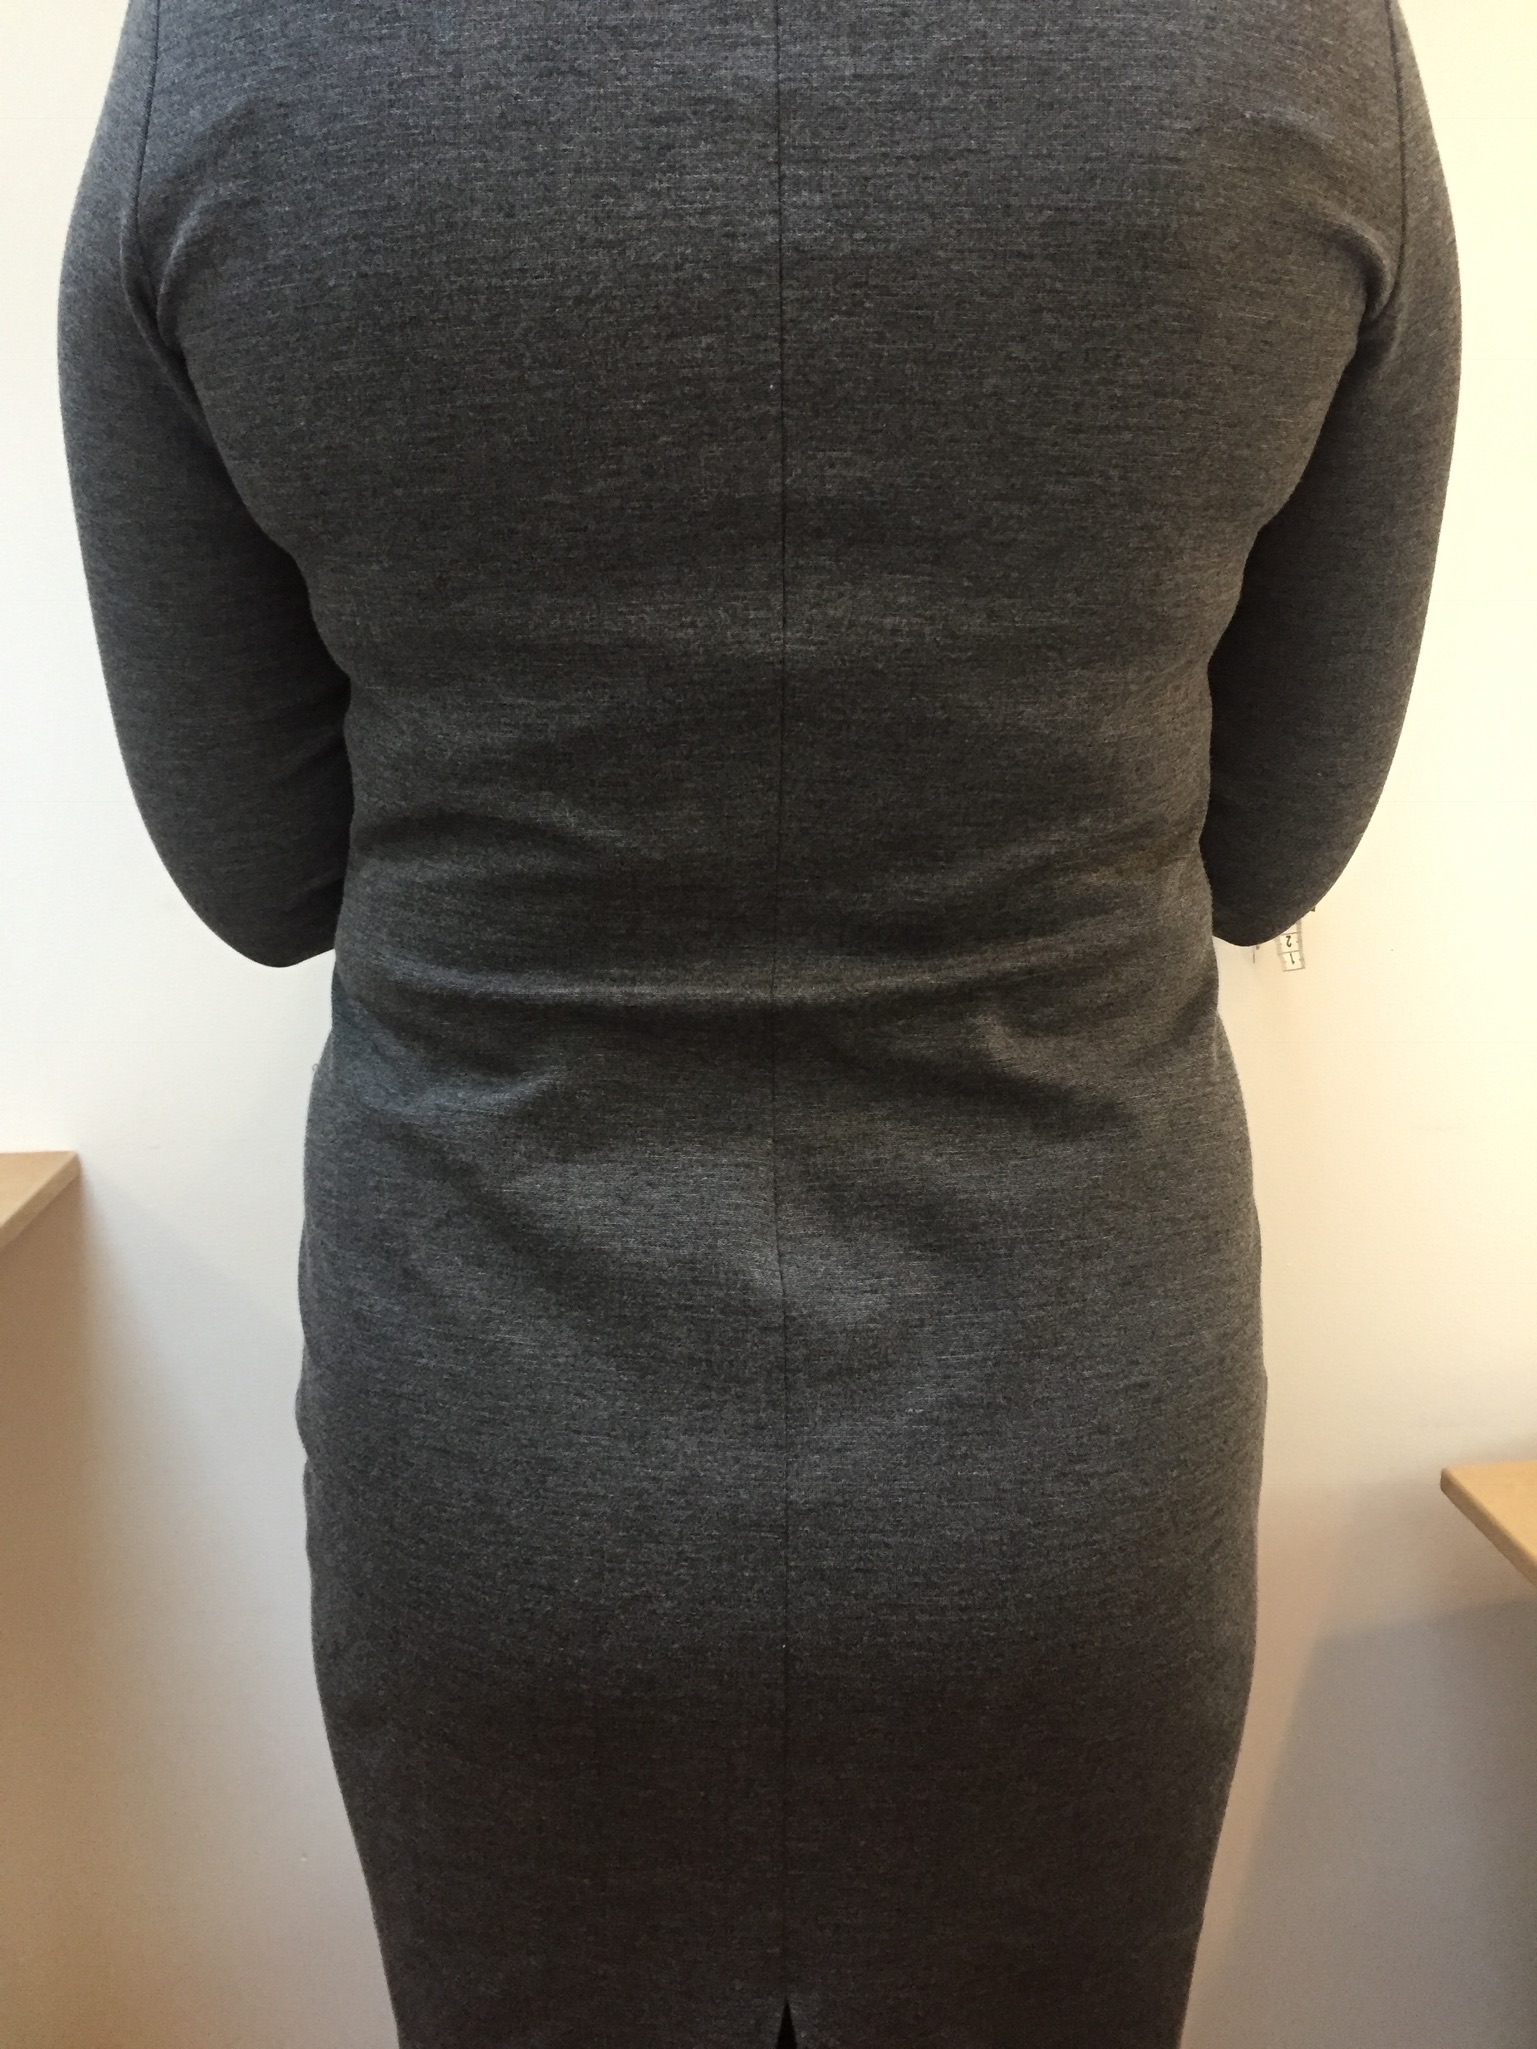
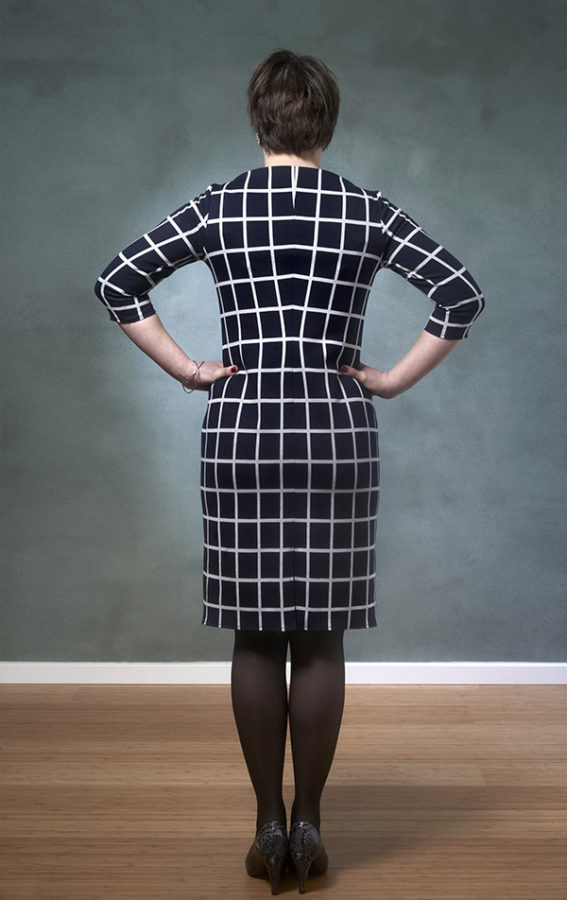
Because what happens if your back is curved, but wear a close fitting dress that is straight is this (only usually a bit more, because this dress actually is shaped a bit):
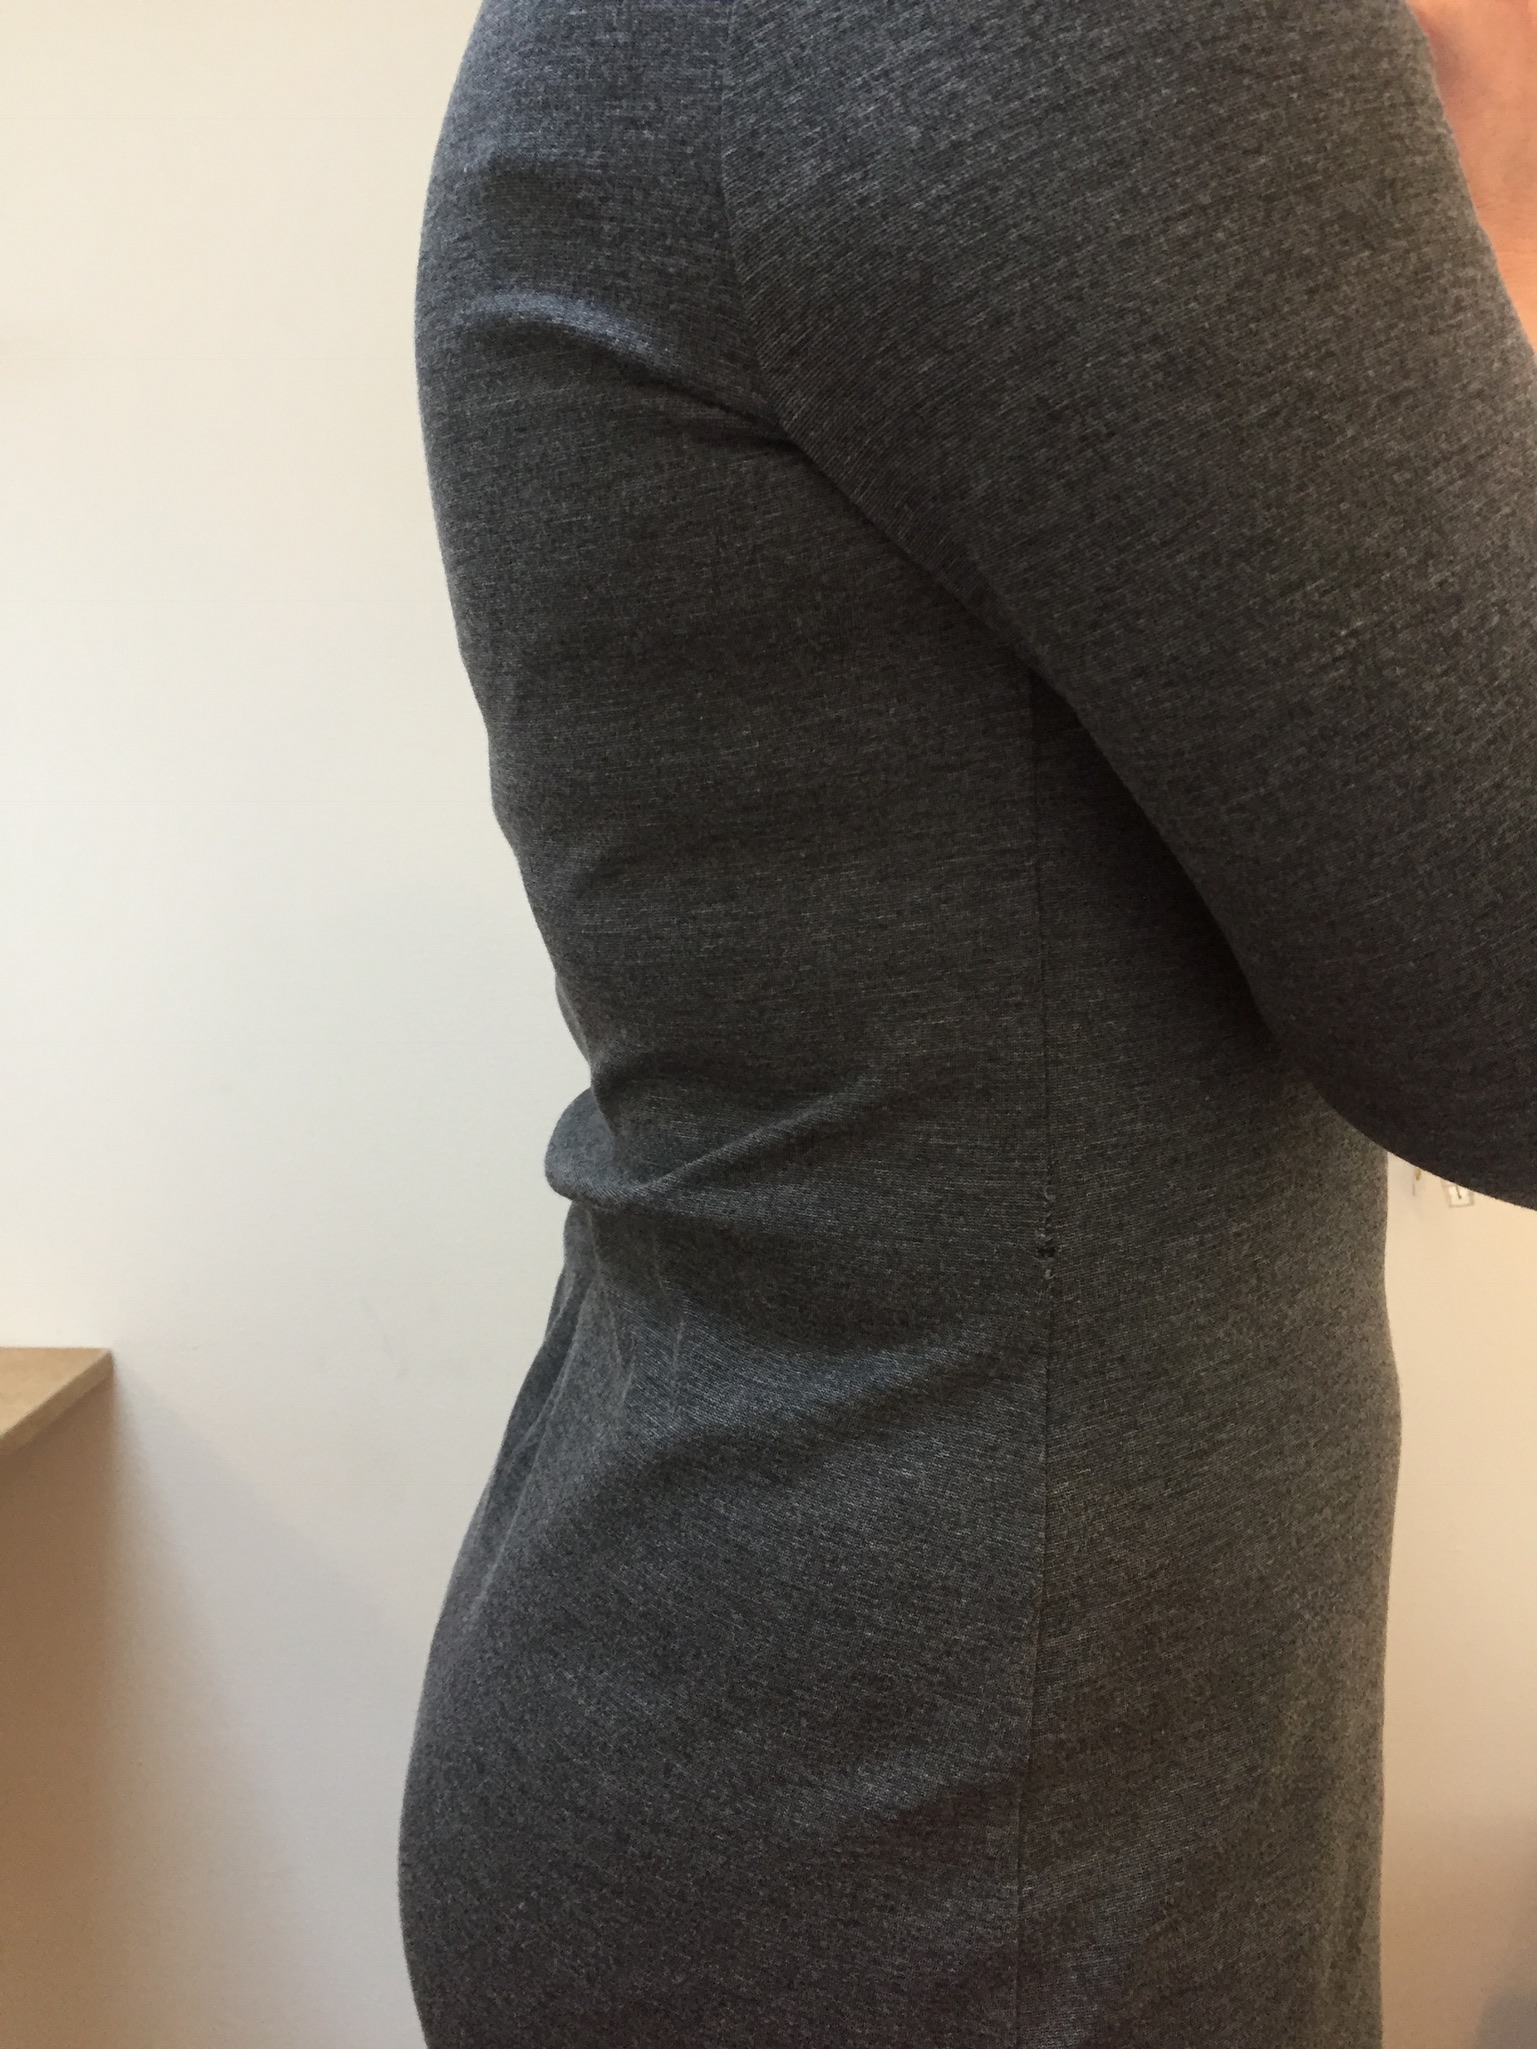
The fabric is going to fall in folds across the back – in a not very flattering way.
Well, it’s thankfully super easy to fix in the pattern!
How to do the swayback alteration and remove the folds on the back
Put on your dress (the muslin). Make a fold at centre-back so the dress becomes smooth and the side seams are straight. Pin the fold at centre-back to keep the fold in place.
Take of the muslin and get out your back piece. If you are using a pattern with seam allowances included, you need to measure out and draw in the seam-lines before moving on!
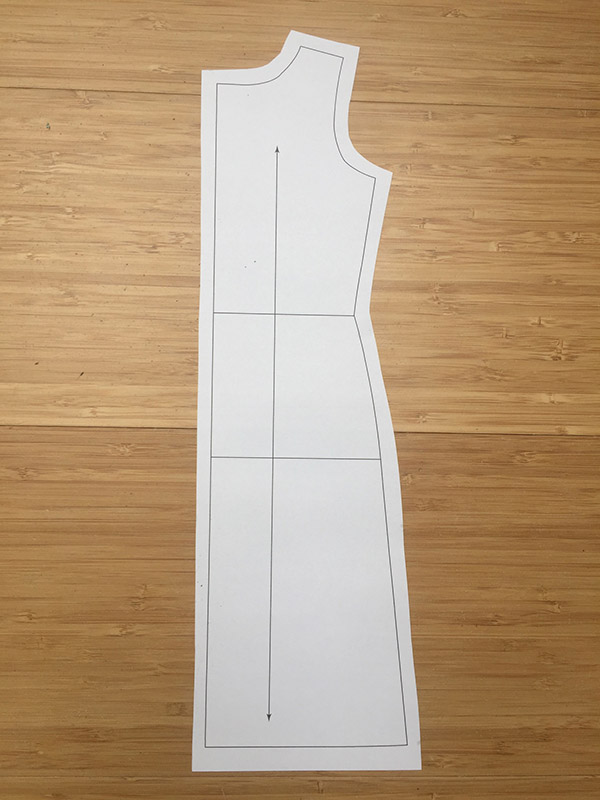
In this tutorial, I’m showing the technique on a jersey dress with a straight centre-back. But it’s the same for any type of dress.
First you need to figure out where on the pattern, you are going to make your alteration. Meaning where on the back, you have excess fabric.
Begin by marking the placement of the pin on both sides of your fabric. Use a marker or extra pins. Fold out the fabric and measure the distance between the two markings and their placement on the centre-back line (measure from the waistline, if you have that marked, or measure from the neckline and down). Measure on the fabric and transfer the measurements to the pattern piece.
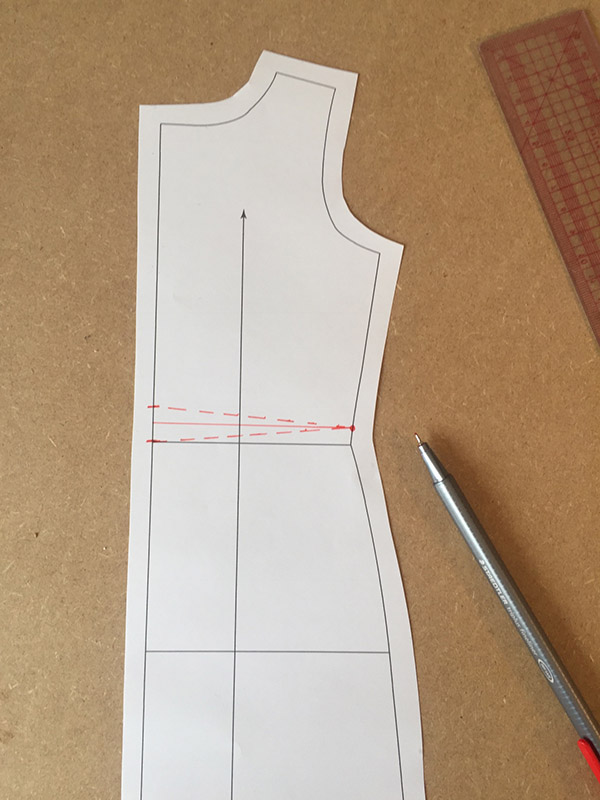
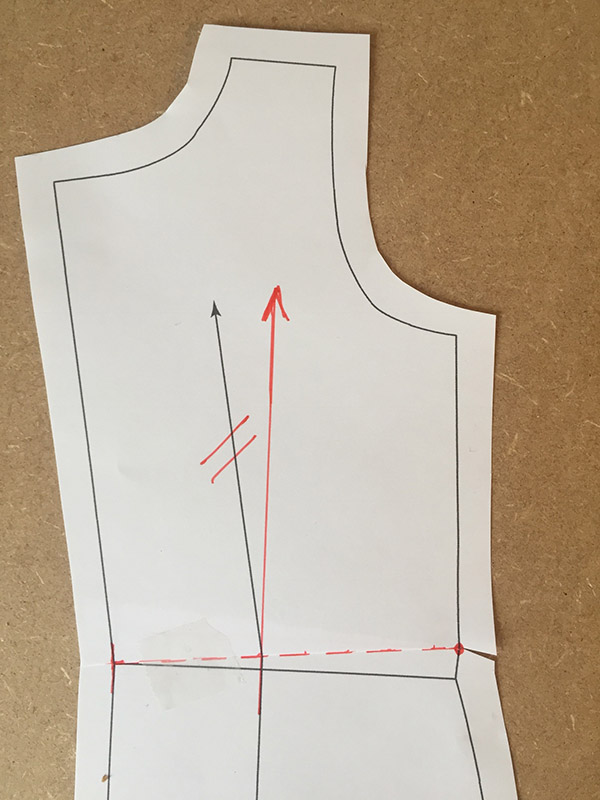
Markings for swayback on the pattern
Draw the markings on the pattern at centre-back

Transfer the placement of the pin and the amount of fabric you pinned, to your back pattern piece
Locate the midway point of the two markings and draw a straight line from that and across the back piece to (but not through) the side seam.
Draw two lines, one from each marking to the point in the side seam where the first line ended.
Draw lines to the side seam
Making the swayback alteration
Cut along the top most line to, but not through, the side seam.
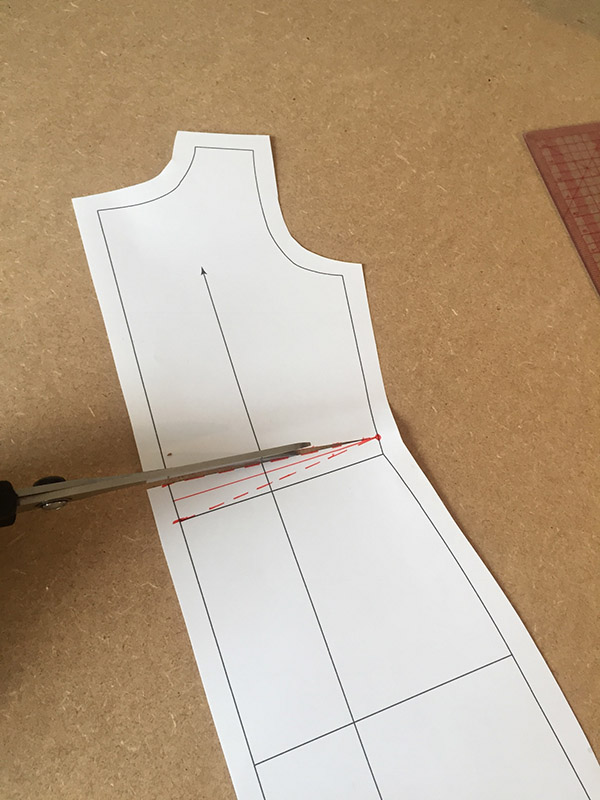
Cut along one of the lines to the side seam, but NOT through
Also cut from the seam allowance to, but not through, the side seam. This will give you a small hinge of paper that makes it possible to move the pieces.
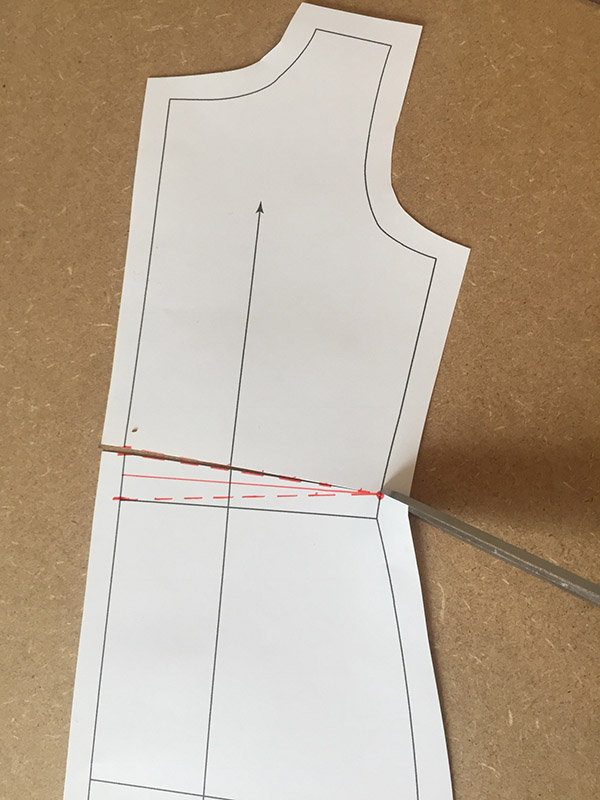
Cut the seam allowance to, but not through, the seam line.
Now turn the top piece down to the bottom most line, so that the pieces overlap. This will remove the excess fabric.
Place the two lines on top of each other, to overlap the paper. Tape it in place.
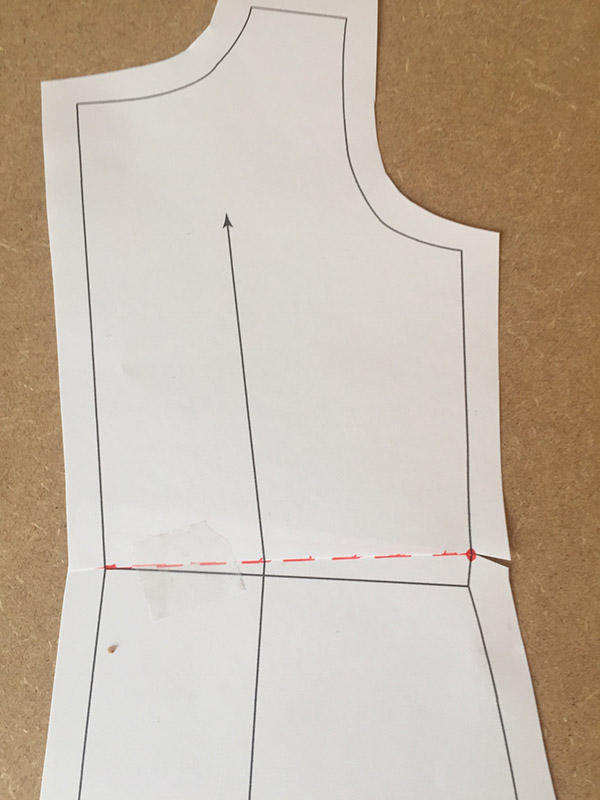
Now you just need to correct the grainline and maybe even out the seam line so it that it is curved. The grainline needs to be perpendicular to the hem of the dress.
Re-draw the grainline and even out the seam lines if they are jagged.
And that’s it!
The next dress you sew from the pattern will be without folds on the back.
P.S. You don’t need to sew a new muslin because of the swayback each time you make a new pattern. If you, for example, now know that you need to remove 3 cm when there is a straight centre back seam in a jersey dress, you can count on that being the case for any jersey dress with a straight centre back seam.
P.P.S Want more fitting help? Then take a look at Foundation of Fitting, my e-book on fitting.


So, wouldn’t this adjustment lift the hemline of the back? Is there some compensation for that? Also, the back seamline is no longer straight, is there no truing for that?
Thanks, I’ve tried dealing with this problem for a long time.
Dear Peggy
No, the alteration will not make it rise up in the back. The fabric you are taking away is already laying in folds across your back.
If the hem line does ride up, it’s a different alteration – namely that you probably have a protruding behind, that needs extra fabric.
I go into this in details in my Foundations of Fitting e-book (https://www.mariadenmark.com/shop/foundations-of-fitting/ )and the accompanying videos – but basicly it’s the opposite alteration of the swayback – only placed further down – over your butt.
Oh I forgot to add: The centre back will have to be curved to accommodate for the shape of your back, so you will have a seam there.
So are you saying you cannot cut the back on the fold, it has to be 2 pieces?
You would need to add diamond shaped darts in the back to straighten out the center line.
Hi Maria,
can you show the full finished illustration of the center back seat after the alteration?
I LIKED YOUR TECHNIQUE.BUT IF THE DRESS IS SEAMLESS AT WAIST, WHAT CAN BE DONE.
Thank you for this, Maria. Yours is the only blog I found so far to confirm I don’t have to ‘re-level’ the hem. Makes total sense that the extra fabric is removed therefore no more needs to be added.
Is it possible to accomplish a similar alteration on a knit tee with no center seam?
This is really well explained. I have previously done just that sort of alteration for swayback for dress patterns with separate top and bottom pieces (adjusting the top by pulling up at centre waist and truing the sides to fit the skirt).
How would you alter this sort of pattern if it has back darts that run from below shoulder level to high hip height please? Should I true the darts running from the skirt to the top, as per the grain line?
How do you take the excess fabric out I’d the pattern is placed on the fold? I’d love to know I am sway backed and find very few garments fit me well.
How to reduce fullness in back vertical