
Are you sewing darts the right way?
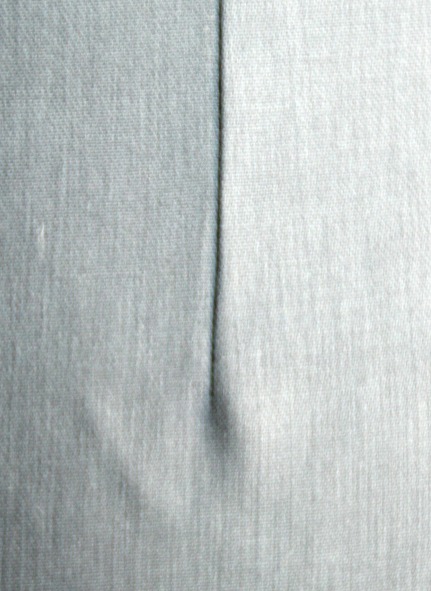
I don’t really believe in right and wrong in sewing – if it gets the job done, I’m all for it. But in sewing darts there is … a better way to do it! And if you experience always getting this small bubble underneath the darts you sew, like on the picture here, you are doing it the not-right way…
Learn to sew darts the better way..
Darts are one of the things that can really be a challenge when you start sewing clothes. They are marked on the pattern as triangles to sew away, but when you sew them, you get a small fold or bubble just where the dart ends. Which is really, really annoying.
The reason why the bubble is there, is because the fabric doesn’t fit the shape of your body and that there is too much or too little fabric right where the dart ends. To understand why, let’s have a look at the theory behind sewing darts.
What are darts in sewing?
Darts are – to put it short – triangles in the fabric, which you sew closed to give the flat two-dimensional fabric, three-dimensional curves that’ll match the curves on your body.
To illustrate, have a look at the drawing here. The big blue square represents a skirt, and the grey triangles are the darts we sew closed, to make the fabric take shape.
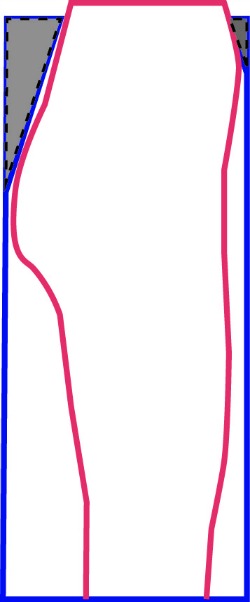
The darts are marked here and on your pattern as triangles.
But. Your body doesn’t have sharp triangles. It has curves. And that is why you should also sew the darts as curves. We’ll get back to that in a moment.
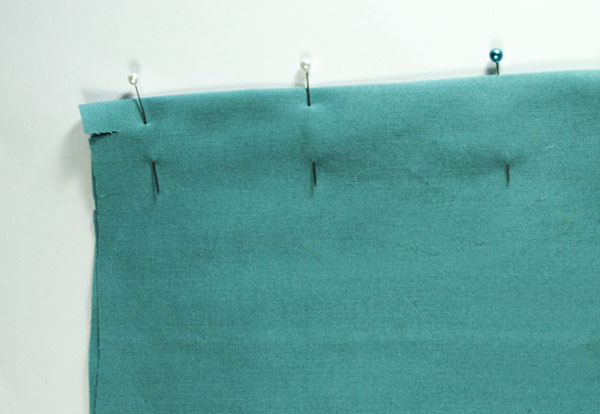
First you need to pin the dart. Place the notches (from the end of the dart legs in the pattern) on top of each other and let the fold of the fabric go until the pin you placed when you marked the tip of the dart.
If you want to, you can now use chalk to draw a line from the notch to the tip of the dart (the blue pin in the picture).
How to sew darts
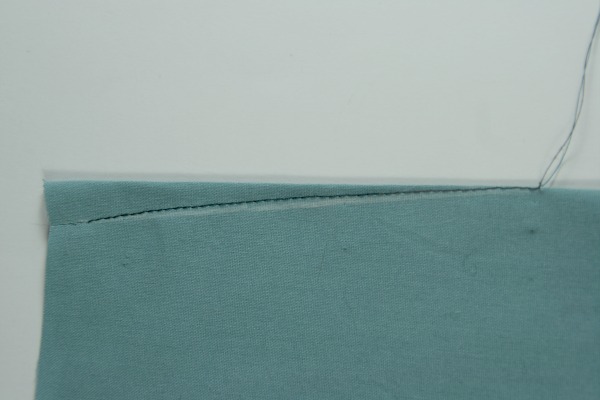
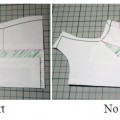
Now. When you are sewing darts DO NOT follow that straight line (that would create a triangle, which won’t match the curves on your body). Instead you want to sew in a soft curve from the notch to the fold about 1 cm (3/8″) above the tip of the dart, then continue right at the fold for the final stretch. See how in the picture below.

It does sometimes take some practice to get the curve just right. This is where your remnant box comes in. Grab a bunch of remnants and sew maybe 10 darts to get the feeling for the right curve. It’s always a good idea to practice on scraps when learning new techniques, anyway.
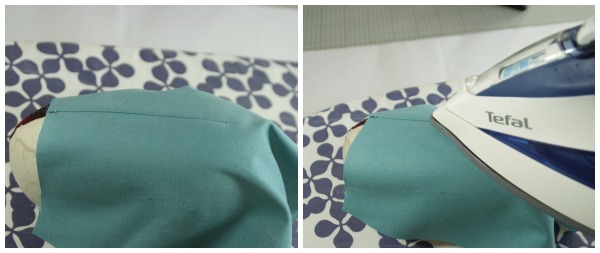
How to press darts
Once you have stitched the dart, it’s time to press it into shape. First you want to press the dart flat from both sides, as it’s sewn, to set the stitches. Then place the dart on the matching curve on a pressing ham (or a tightly rolled up towel, if you don’t have a ham).
I like to press from the right side first. Let the dart cool of completely before you remove it.
Would you like to know more about darts – and especially how to shape them to fit your body? Then have a look at my online class: “Fitting 101 – Skirt Fitting” which will teach you how to fit your clothes using a muslin/toile – in a way that makes sense!

Hi, thanks for the article ! But I was wondering, shouldn’t the curve on the dart pictured be curvy towards the fabric in the dart, not towards the main part of the skirt ? So that when the fabric is turned in the right shape, it follows the body ?
That’s what I see on the picture: / )/ when it feels like it should be: / (/ no ? (the “/” represent the side of the fabric and the “(” the shape of the dart))
I hope you understand what I am trying to say ^^’
Follow the way it’s shown here. That way it will skim over the body. The curve should be curved away from the body, toward the dart fabric.
I understand what you mean. The dart illustrated above would be for a bust dart or the front waist of a skirt for someone with a round belly. You could sew the opposite curve for back waist dart in a blouse, since the lower back curves in and then out.
It takes some experimentation though, and practice fabric is crucial. It’s awful to spoil your handmade creation with a dart bubble right in an obvious place. :-)
Thank you for this useful information :)
sew both and see which one gives you the curve you desire, Remember what you see is the opposite of what you get when you open it up.
Next time I make a skirt, I’m definitely trying this!! Thank you for this tip!
That is a great tip! All this time sewing, I can’t believe I didn’t know this! Thank you!
This is really interesting, and not something I’ve ever heard of before. BuT it does make sense. I don’t generally have the bubble problem, but I think I’ll give this a go anyway. Thanks so much for sharing.
I have just put bust darts in a dress I’m making only to see this bubble; so I Googled for curved bust darts and you showed exactly what I need. Thank you.
thanks Maria! This is really useful. Will give it a try
Great article ,this was very helpful and I will definitely use this technique the next sewing project I create with darts.
Thank you for great tips!
I wonder can I sew a dart with overlocker on knit fabrics?
This perfectly addressed the challenge I was facing with a top I am making. Thanks for the wonderful explanation!
Wow! Just signed up for your site & immediately learned something; with all the literature available I still suffered from Weird Dart Syndrome & now I *finally* know the full story on darts. Many thanks!
After many years of sewing this is a real revelation and makes such sense, why didn’t I realise this before?
Thank you.
I’ve used this technique to alter garments that didn’t quite fit right, but I never knew how to do it with a store-bought pattern. Thanks so much for making this!
Thanks a lot recently I was going through this problem.I will try this ,hope it will work.
Just the information I was looking for!!! Thank you sew very much!