
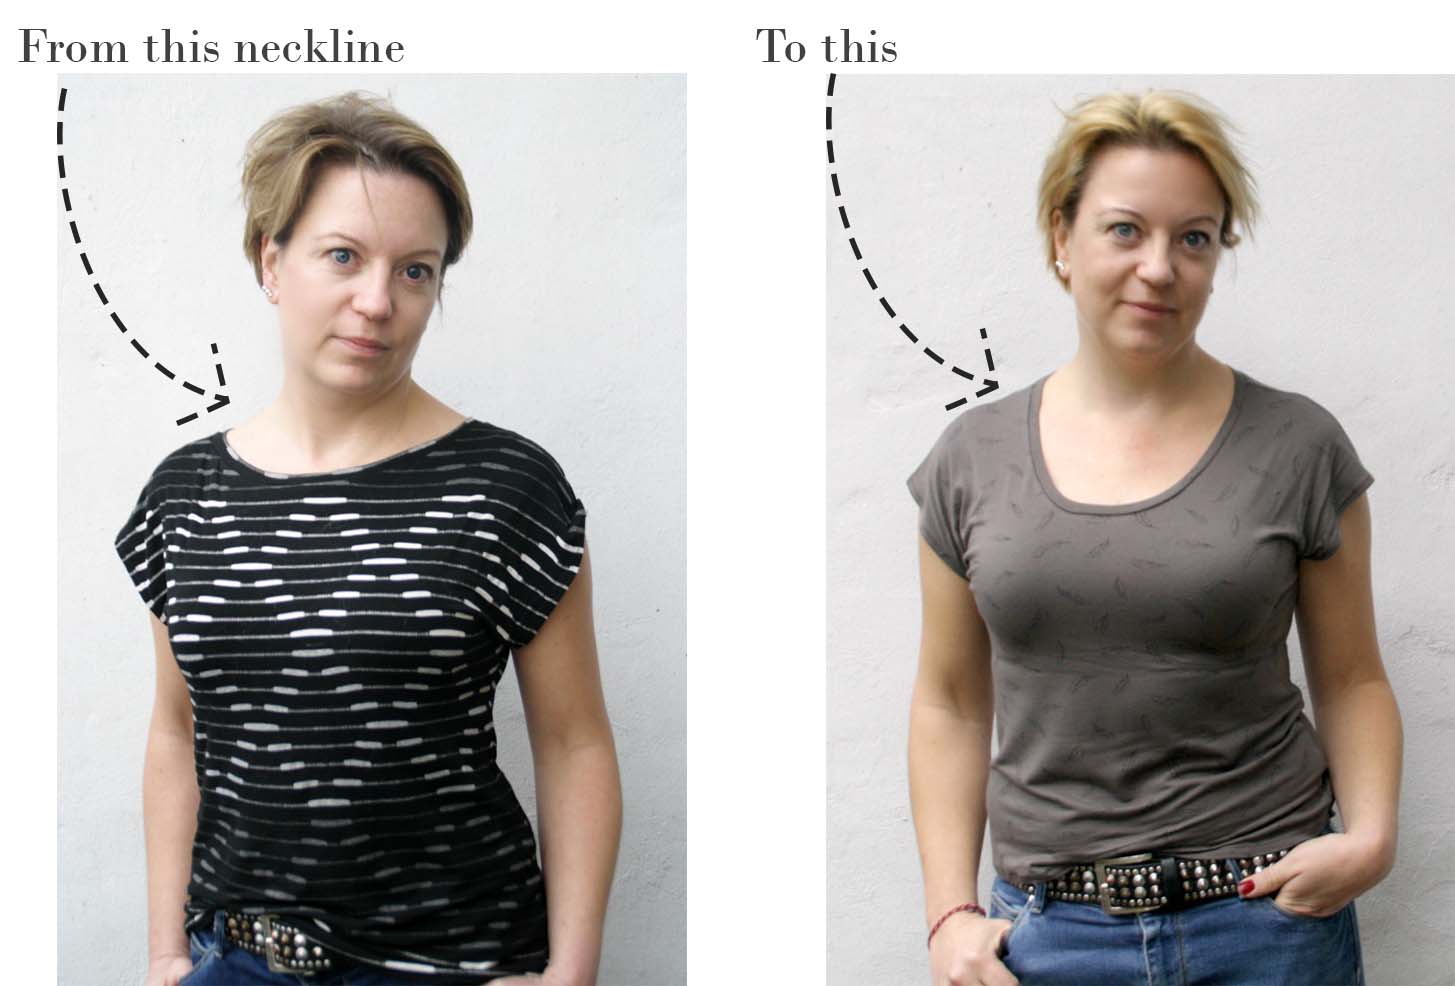
How To Easily Change The Neckline On Your pattern
One of the really easy tricks to getting the most out of your sewing pattern (such as the free Kimono Tee pattern, you get when you subscribe to the MariaDenmark Newsletter) is to make small design changes to the pattern – for instance by changing the neckline.
It’s really easy – so easy that I for a while thought it would be too obvious for another blog post. But then I got a few questions on the topic for the Q&A and also I remembered how I had felt when I was looking for a t-shirt pattern with a deeper neckline and the sales person told me I could easily change it, but I didn’t have a clue to how.
So here is the new post on how to design your own neckline on the MariaDenmark Kirsten Kimono Tee pattern!
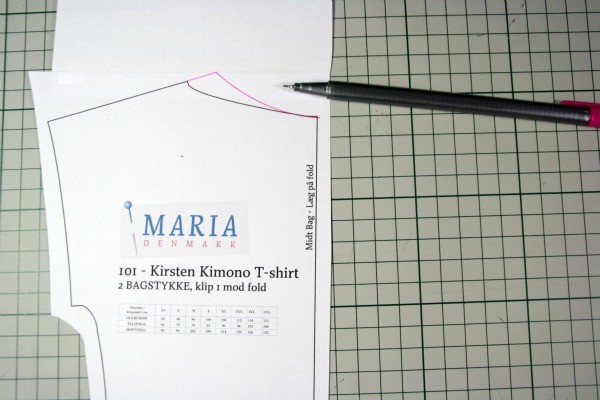
You’ll need your front piece and your back piece.
Here I’m showing the technique on the free kimono tee pattern – and the Danish version, no less, so you should probably be told that “FORSTYKKE” means “FRONT PIECE” and “BAGSTYKKE” means “BACK PIECE”. Anyway. What I meant to say is that you can use this technique on just about any dress or top pattern.

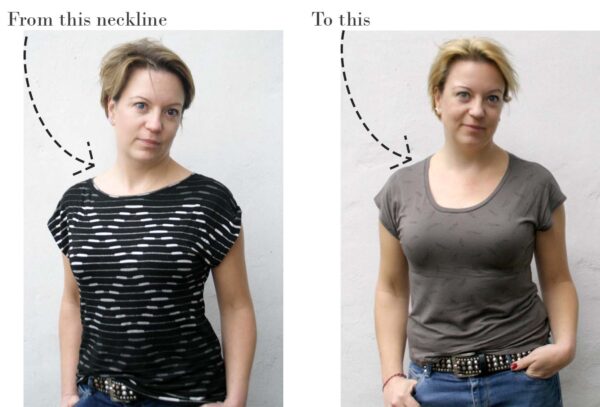
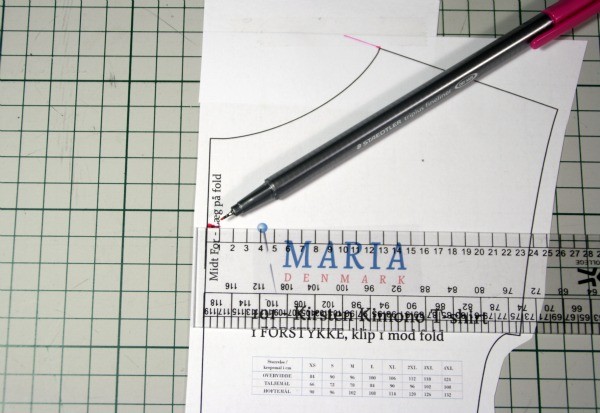
Step 1: In this case, I wanted more of a rounded U-neckline, instead of the boatneck that came in the pattern. And the first thing I want to do is to get the neckline to sit closer to the neck. I tried the original tee on and guesstimated that I wanted the new neckline to sit 3 cm (1 1/8″) closer to the neck.
So I begin with the front piece and draw the shoulder line 3 cm longer.
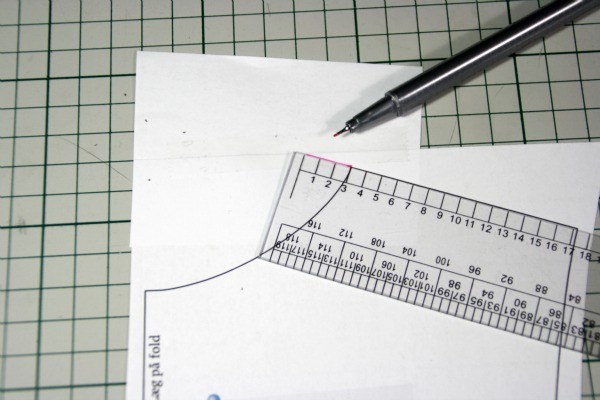
Step 2: Still on the front piece, I want to deepen the neckline at centre front. I’ve decided to make it 6.5 cm (2 ½”) deeper, so I making a mark 6.5 cm down the centre front line (MIDT FOR means “Centre Front”).
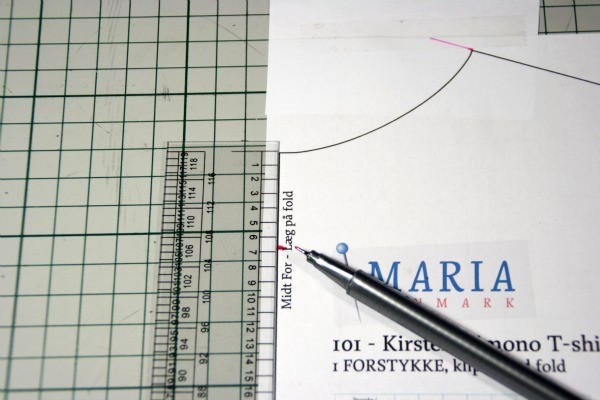
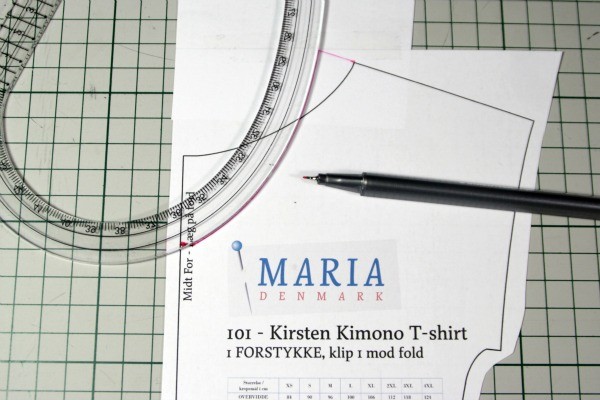
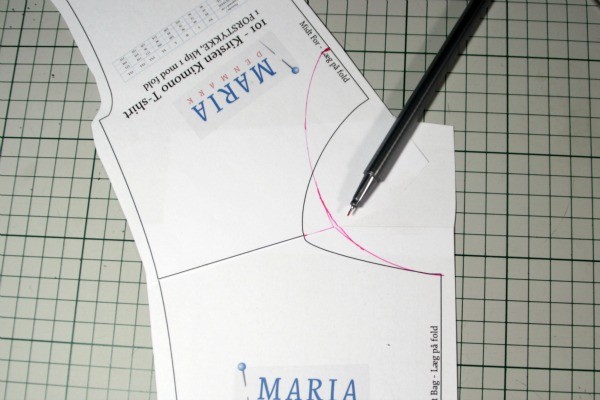
Step 3: Since I want to make a rounded neckline, it’s important that the new neckline meets the centre front line on a straight angle. If it doesn’t, the neckline will be more v-shaped. So I’m drawing a small 1 cm (3/8″) line perpendicular on the centre front line.
Step 4: Now I just need to draw a nice curve from the perpendicular line and to the shoulder line.
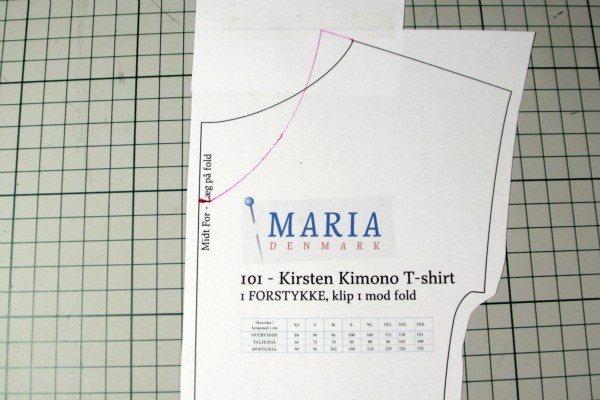
And here is the front neckline done.
Step 5: Now it’s time to work on the back piece. I begin by elongating the shoulder line by 3 cm – the same as I did with the front.
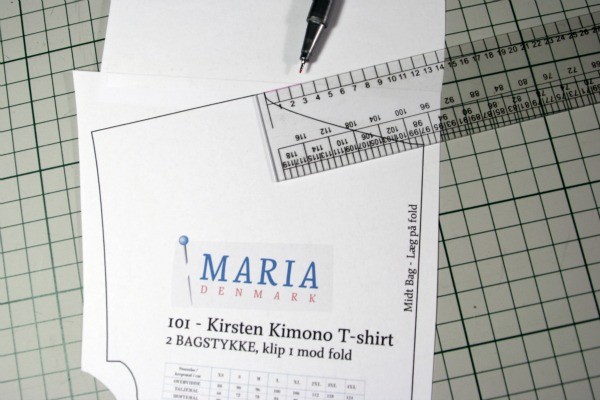
Step 6: Since I don’t want to change the depth of the back neckline, I’m just drawing a new curve from centre back to the new shoulder point. And that’s the back piece done!
Step 7: Now I just need to make sure the transition of the neckline curve from front to back at the shoulder is smooth. To do that, I place the front and back together at the shoulder seam lines and evaluate the curve. In this case I needed to adjust the curve a tiny bit – so the curve closest to the pen is the one I’m going with.
And that’s all there is to it. It does take longer to explain than to actually do!
http://www.mariadenmark.com/wp-content/uploads/2015/11/design-your-own9-600×400.jpg
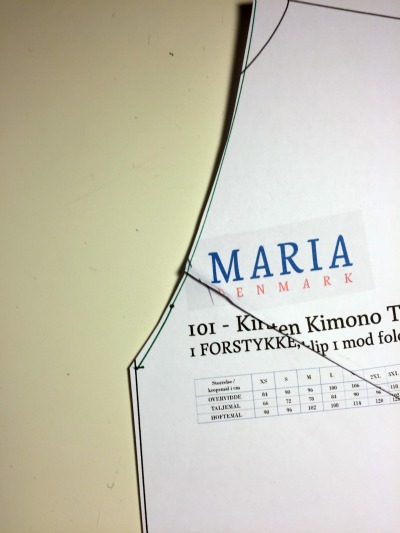
PS: (Important note) If you are making a very deep neckline, or perhaps a V-neckline, the neckline will fit better (and hug your body) if you pinch out a small piece of the neckline, like I do in the picture. 0.5 cm – 1 cm is enough.
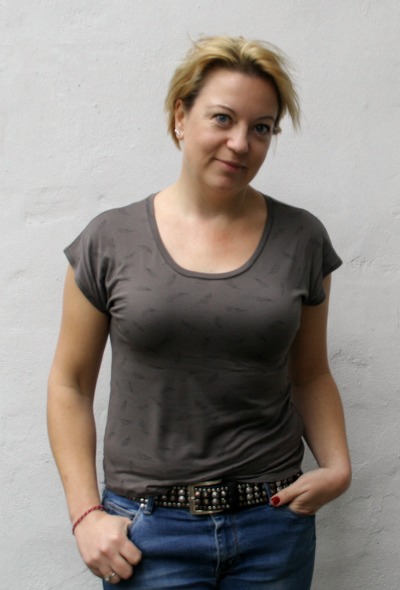
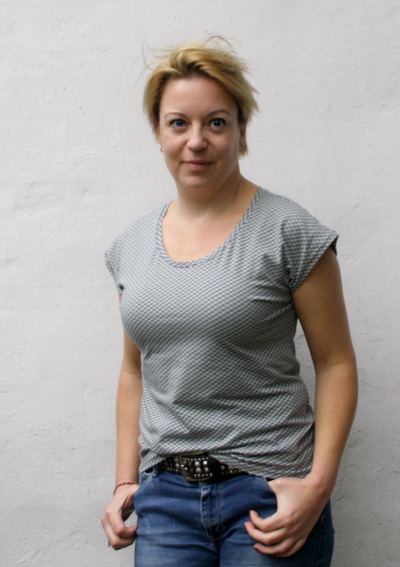
Here I made the new Kimono Tee in a remnant of a very nice rayon/wool jersey designed by Aime Comme Marie (I got it at MeterMeter.dk). Unfortunately the shop doesn’t have anymore of this particular quality. Which is a shame. I love it!
And this one was made in an Art Gallery cotton jersey. It’s called Miniature Hills.


How do you finish the neckline? What kind of stitch do you find works best?
Hi Harlene
I have several favorite methods, depending on the look I’m going for (like this one https://www.mariadenmark.com/2014/10/qa-sewing-with-knits/ )
For that method, I’m using my serger. If I do a binding instead, I’ll use a longer straight stitch on my sewing machine for the final stitching. I don’t seem to have a blog post up on that yet – I’ll fix that real soon 😊